LNR200 / LNR300 Series: Setting up third-party email
Lorex provides email services to customers who have NVR systems connected to the Internet. If issues arise using the default Lorex email server, we recommend switching to a third-party email server such as Gmail or Yahoo! If you wish to set up a third-party email account with your NVR, you will need to enable Simple Mail Transfer Protocol (SMTP) in your account.
Prerequisites:
- Connect your NVR and router with an Ethernet cable and ensure you are connected to the Internet.
- In your NVR settings, ensure that motion events and email alerts are enabled.
To configure email alerts:
-
Right-click on the Live View, and then click Menu.
-
Click Configuration and then click Network.
-
Click the Email tab.
-
In the Email drop-down, select Enable to use a custom email server.
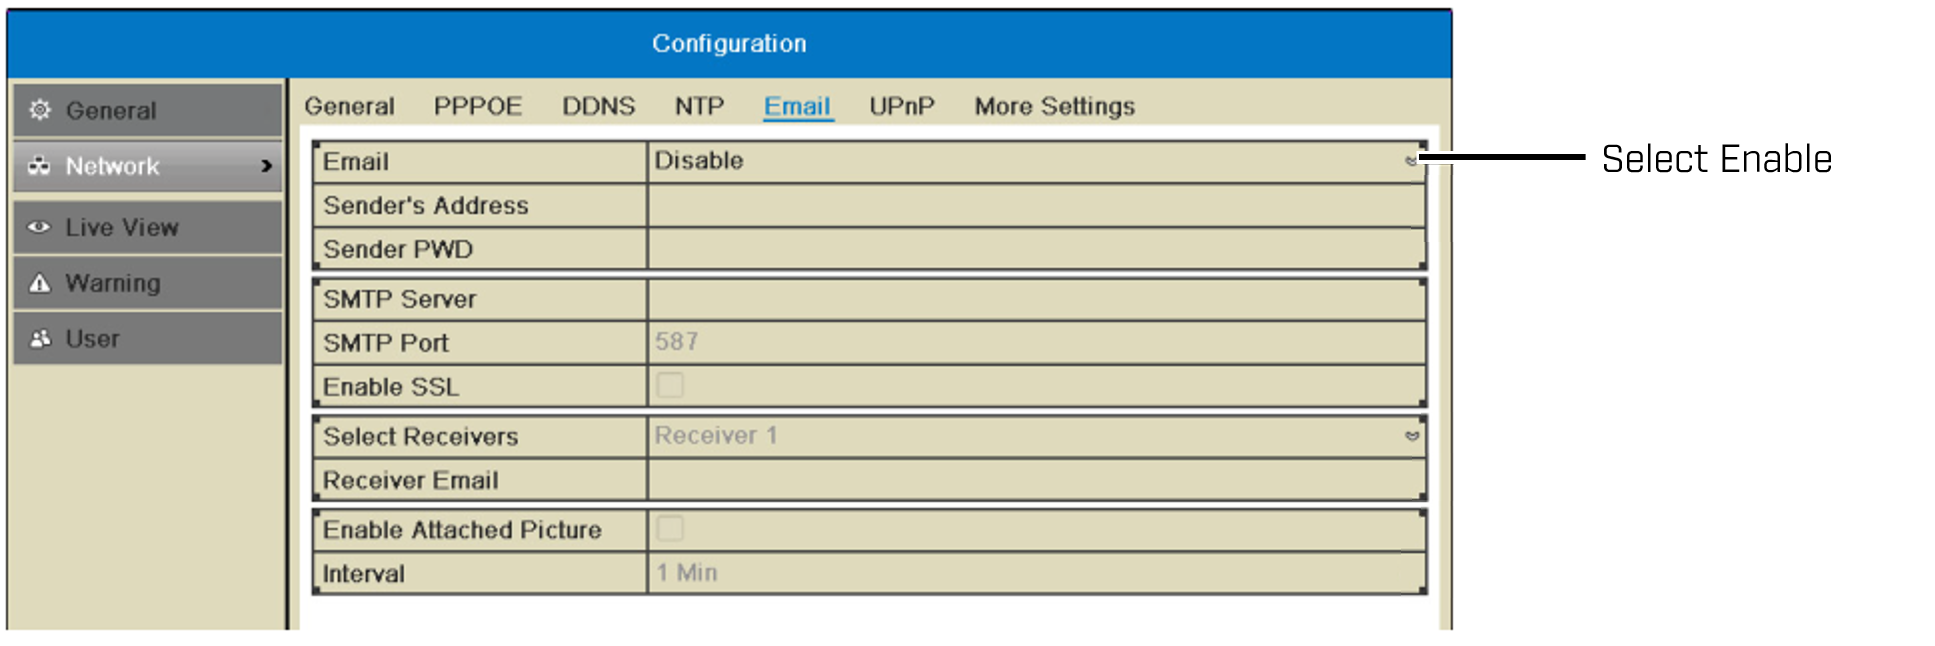
-
Configure the following:
- SMTP Server address: (Gmail: smtp.gmail.com Yahoo!:smtp.mail.yahoo.com).
- SMTP Port: (Gmail/Yahoo!: 465).
- Enable SSL: (Gmail: SSL Yahoo!: none).
- Receiver Email: Enter the email address that will receive alerts.
- Select Receivers: Use to enter additional email addresses that will receive alerts. Alerts may be sent to up to 3 addresses.
- Enable Attached Picture: Check to include an image attachment from the camera that triggered the alert.
- Interval: Select the interval the NVR will wait between sending out emails when events occur.
-
Click Apply to save settings.
-
Click Test to send a test email.
IMPORTANT: Before the NVR will send out email alerts for motion detection, you must enable the Send Email action for each camera.
Some third-party email providers such as Gmail will require an update to email settings to receive these alerts.
To update Gmail settings to receive motion alerts:
-
Log in to your Gmail account.
-
Click here and click to Turn on access for less secure apps.
-
Log in to Gmail and click the Gear icon (
 ) on the top-right.
 -
Click Settings and then click Forwarding POP/IMAP.
-
For POP Download, select Enable POP for all mail.
-
For IMAP Access select Enable IMAP.
-
Click Save Changes.
-
In the Email / SMTP window on your NVR, click Test to send a test email.
REMINDER: It can take a few minutes for the email to arrive. Be sure to check your junk / spam folders.