Lorex netHD / netHD Stratus Client Software: Logging in to your software and adding your NVR
You can log in to your Lorex netHD / netHD Stratus Client software to remotely connect to your LNR200 / LNR300 Series NVR using your PC. If this is the first time logging in to your software, it is recommended that you use the Add NVR Wizard to setup the connection.
You can also manually add your NVR using a device ID or IP address. Manually add using a device ID. Manually add using an IP address
Prerequisites:
- Ensure that your NVR is connected to a Local Area Network (LAN). Click here for information on how to connect your NVR to a LAN.
- Ensure that you have your NVRs local IP Address. Click here for information on how to access your System Device Information.
To connect to the NVR on the LAN using the Add NVR Wizard for PC:
-
Install the Lorex netHD / netHD Stratus Client Software for PC from the CD or download the client software. Click here for downloads and documentation for your product.
-
Double-click the Lorex netHD Client icon (
 ) from the desktop to open the Add NVR Wizard.
 -
Click Enter Wizard.
-
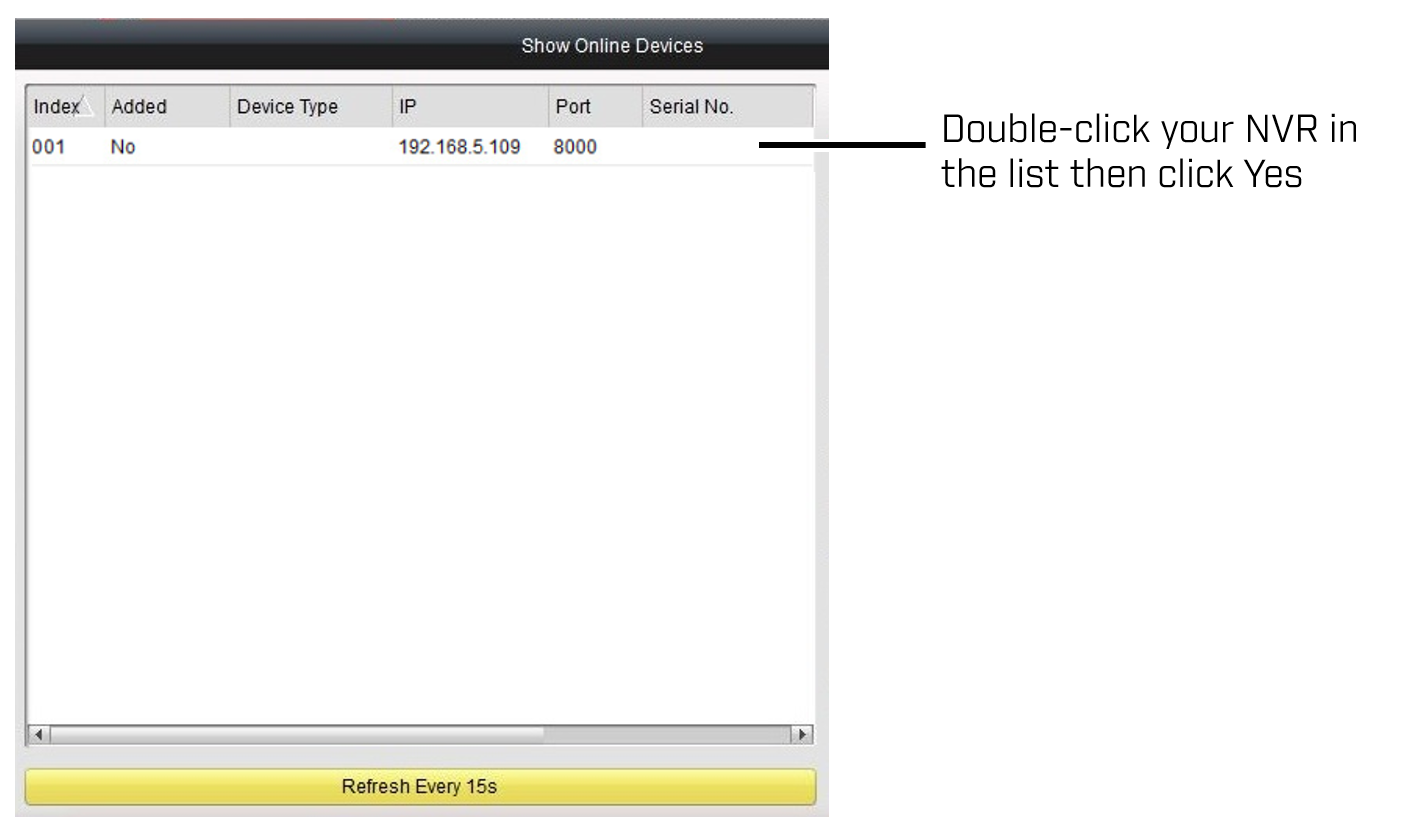
Click Show Online Devices to scan for NVRs on your network.

-
Double-click your NVR in the list and click Yes to open the Add Device window.
-
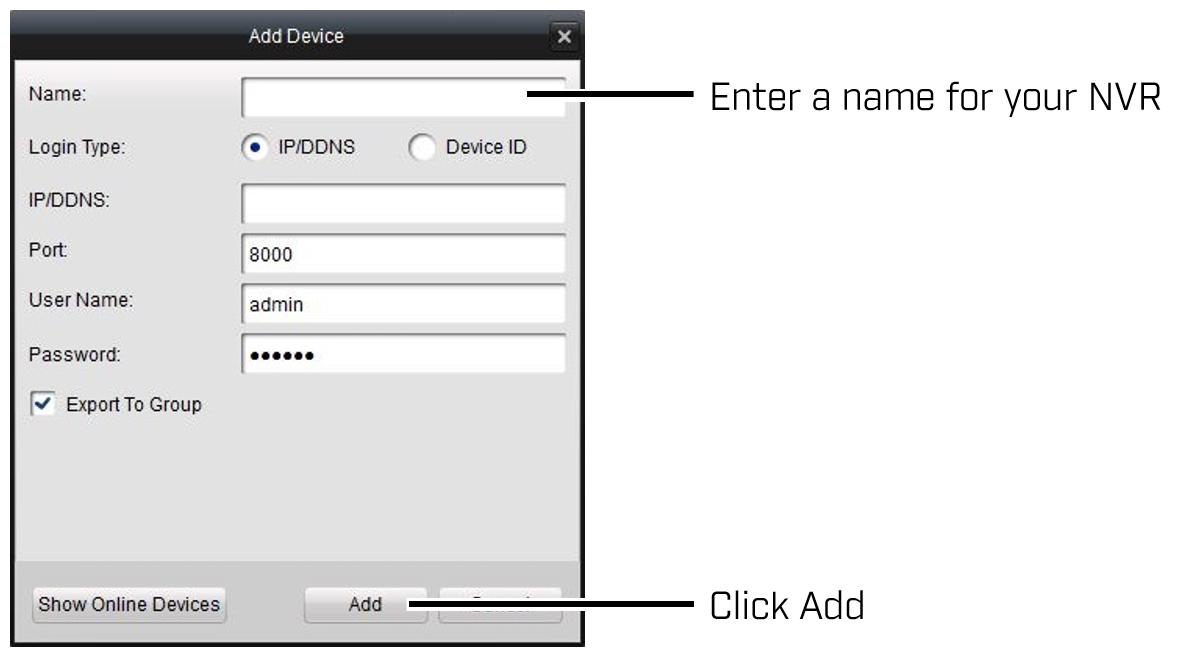
Enter a Name for your NVR of your choice. Select IP/DDNS or Device ID and enter the IP address or device ID. Click Add to display your NVR in the list.
-
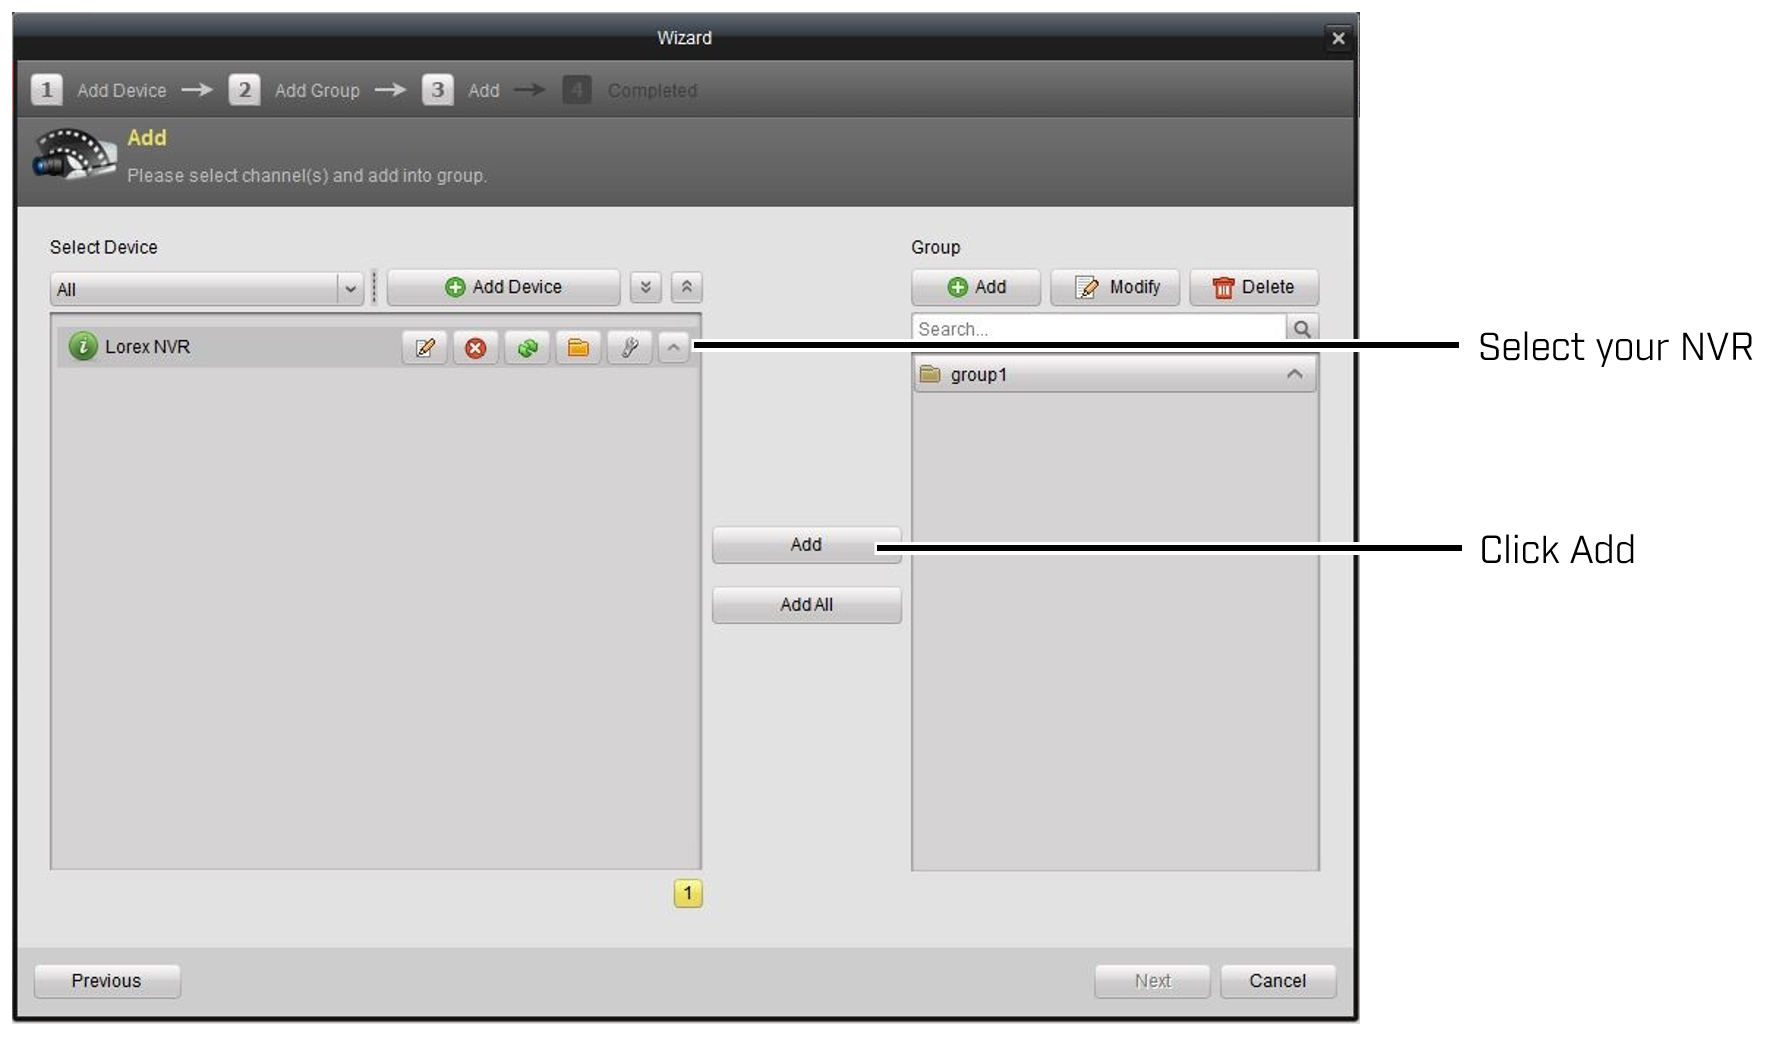
Click Next to open the Add Group window and then click Next.
-
Select your NVR from the Selected Device list and then click Add in the middle of the screen to add it to the Group list.
-
Click Next to complete the Add NVR Wizard.