LHB Series: Configuring basic network settings
The LHB Series DVR requires an IP address to communicate with the router. The IP address can be automatically assigned by the router using Dynamic Host Configuration Protocol (DHCP), or can be manually assigned a static IP address. You can configure basic network settings using the Settings menu.
RECOMMENDED: Set DHCP as the default network setting. A static IP address requires you to configure the IP address, subnet mask, gateway, and DNS settings.
The following instructions require you to access your system using your DVR and a monitor.
To configure basic network settings:
-
In the taskbar, click the Main Menu icon (
 ), and then click Settings > Network > Network.
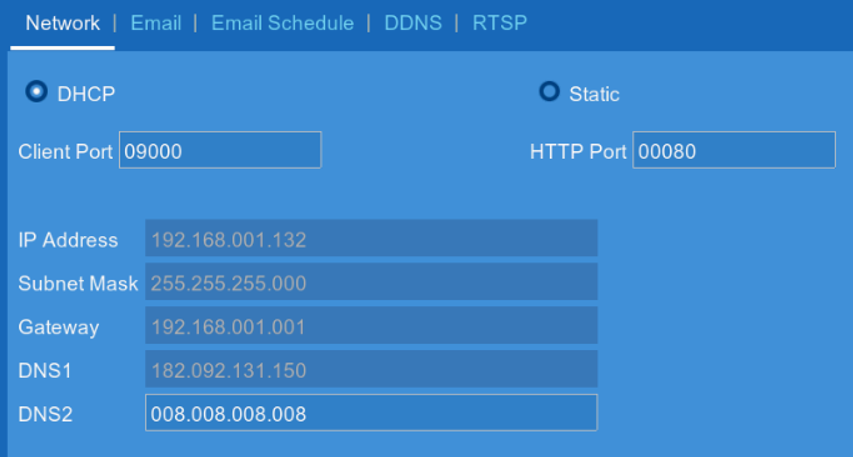
-
In the Network tab, select DHCP or Static.
If you select Static, configure the following:- IP Address: Enter the IP address to be assigned to the system. Ensure that no other device on the network is using the same IP address.
- Subnet Mask: Enter the subnet mask for the network.
- Gateway: Enter the gateway address for the network.
- DNS1: Enter the address of your primary DNS server.
- DNS2: Enter the address of your secondary DNS server.
-
If required, enter a new Client Port and HTTP Port value.
-
Click Save to save configuration settings.
-
Click OK.
Configuring basic network settings using the FLIR Client 12 software for PC / Mac