HD WiFi Cameras: Mounting the camera
You can mount your HD WiFi camera in a secure and permanent position if desired.
Prerequisites:
- Determine the best mounting position to get a view of the area you want. Ensure the power cable is long enough to power the camera.
- Install the Lorex Secure app, available for Android on the Google Play Store or iOS (Apple) on the App Store.
OR - Install the FLIR Secure app, available for Android on the Google Play Store or iOS (Apple) on the App Store.
- Ensure you have connected to your DVR / NVR system or HD WiFi camera using the Lorex Secure / FLIR Secure app.
- Click here for information on how to set up remote access to your DVR / NVR system.
- Click here for information on how to set up remote access to your HD WiFi camera.
- Install the camera in an area with a strong Wi-Fi signal from your Router. You can check the Wi-Fi signal using the signal indicator on your smartphone or tablet.
IMPORTANT: Keep the cables at least 3ft / 1m away from baby cribs and out of reach of children and infants. Use the included cable clips to help manage the cables.
To mount your HD WiFi camera:
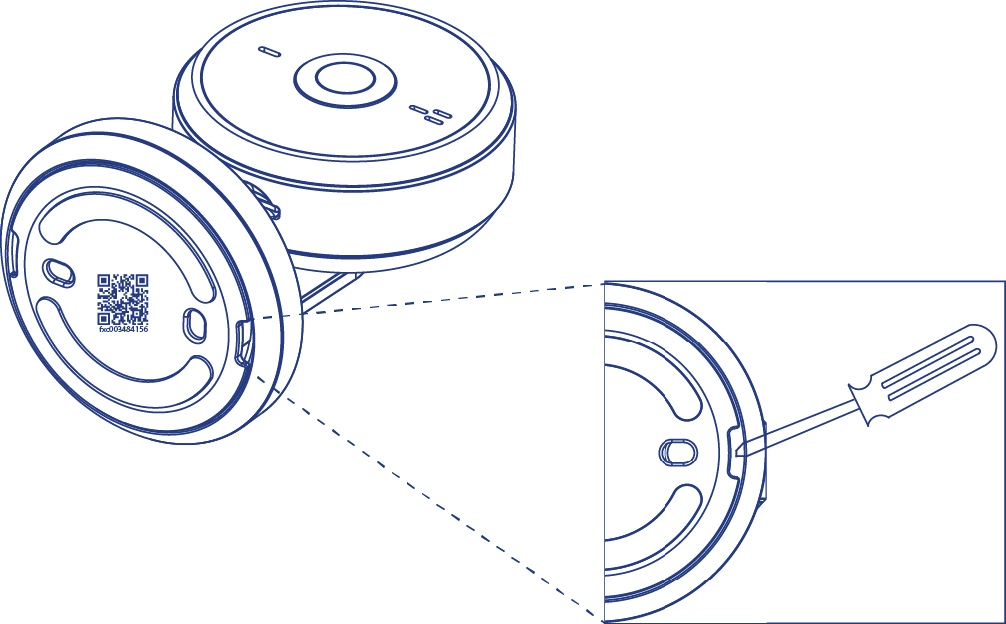
-
Use a flat-head screwdriver (recommended, not included) to remove the mounting plate on the bottom of the camera base.
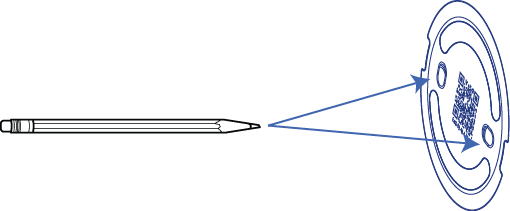
-
Use a pencil to mark holes for the mounting screws.
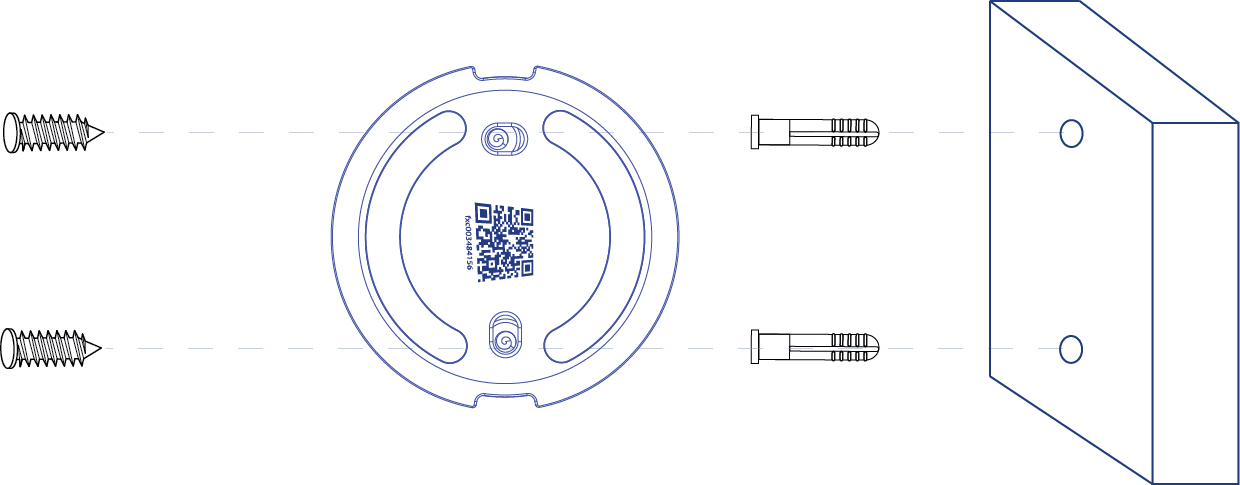
-
Drill holes where marked using a drill. Tap the included anchors into the holes gently using a hammer. Attach the mounting plate to the wall using the included mounting screws.
-
Attach the camera base to the mounting plate. Make sure to push the camera base all the way to secure the camera to the mounting plate. You will hear a click noise when the camera base is securely attached to the mounting plate.