FLIR Secure Web Portal: Configuring night vision modes
Your HD WiFi camera night vision is set to Auto as a default. During low / no light conditions, the camera's Infrared (IR) Cut Filter moves away from the lens to let in 100% of the infrared light for maximum night vision performance. This results in the camera image changing to black and white for better image quality.
You can use the FLIR Secure web portal to turn Off your camera's night vision mode. You might want to do this when you are aiming your HD WiFi camera through a window. Disabling the night vision feature eliminates any halo effect reflection caused by the IR LEDs.
Prerequisites:
- Ensure that you have created a My FLIR account.
- Ensure your HD WiFi camera is powered on.
To configure the night vision LEDs using the FLIR Secure web portal:
-
Go to www.flirsecure.com.
-
Click SIGN IN.
-
On the Live Viewing page, click the Gear icon (
 ) next to your camera.
 -
In the Camera Settings menu, click the Video tab:
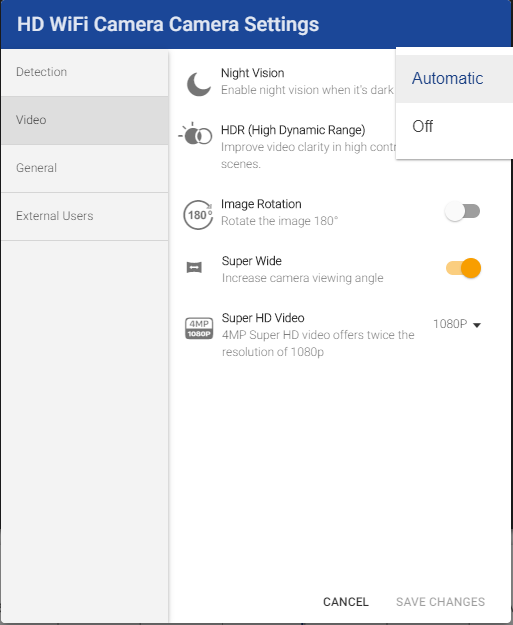
-
To set the night vision LEDs to automatically turn on in low light conditions, click the drop-down menu next to Night Vision and select Automatic.
-
Select Off from the drop-down menu to disable night vision LEDs.
REMINDER: You should only turn night vision LEDs off if the camera environment has enough ambient light to produce an image at night. The camera makes a clicking noise when switching between day and night modes. This indicates that the IR filter is working properly.
-
-
Click SAVE CHANGES when finished.
Configuring night vision modes using the Lorex Secure / FLIR Secure app