Lorex Fusion: Connect Your Wi-Fi Cameras and Accessories (N910 Series)
The following article provides instructions for connecting your Lorex Fusion Collection Wi-Fi Cameras and Accessories to your N910 Fusion recorder.
Our Lorex Fusion recorders incorporate the newest (fusion) technology to connect both wired and Wi-Fi cameras, doorbells, floodlights, and motion sensors to one system. All Fusion compatible Wi-Fi cameras and devices connect to one recorder for continuous 24/7 recording and private local storage. Access everything from the Lorex App for easy control of all devices.
Note: To conserve battery life, Wi-Fi Battery Video Doorbells only record when motion is detected. They do not record continuously.
For any connection issues, see the article Lorex Fusion: Troubleshooting.
Part One — Wired Setup
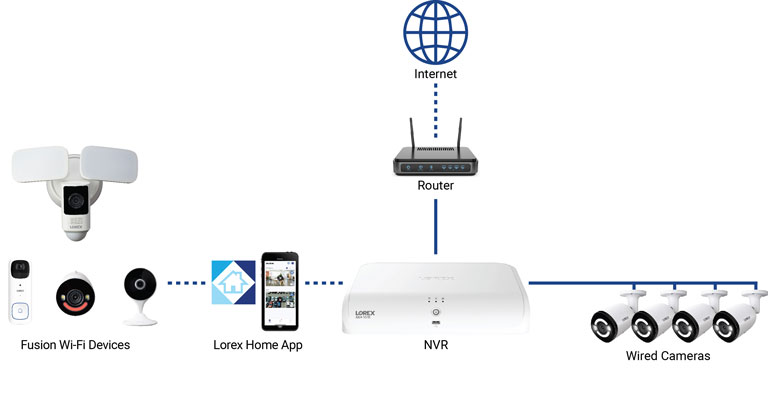
Setup your Fusion recorder and wired cameras. For Basic System Setup instructions, refer to your recorder's Quick Start Guide or Manual on the product support page. Visit help.lorextechnology.com and search your Fusion recorder's model number.
Important: Network setup is required for your system — use the included Ethernet cable to connect your recorder to your router.
Part Two — Connecting your Lorex Fusion Wi-Fi Camera
Connect your Lorex Fusion Wi-Fi Camera to the app and then from your recorder scan your network to add it.
Option A — Connecting Your New Lorex Fusion Wi-Fi Camera to Your Recorder
Add compatible Lorex Fusion Wi-Fi Cameras and Accessories onto Fusion Wi-Fi channels on the recorder.
To connect your New Lorex Fusion Wi-Fi Camera to the recorder:
- From the Live View display, right-click to open the Quick Menu, then click Main Menu.
- Click Devices > Add Fusion Camera > Connect New Fusion Camera.
- Click Setting to select your network.
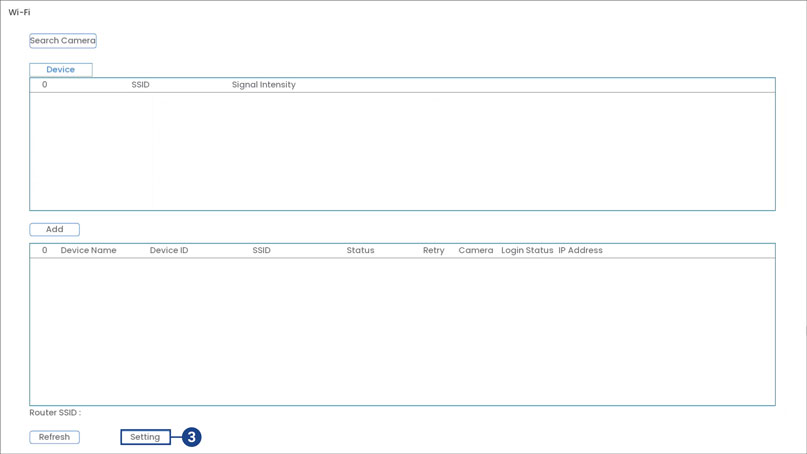
- Enter your network’s password, click Connect.

- Connect your New Lorex Fusion Wi-Fi Camera to a power source. Wait until your camera is in hotspot mode.
- Click Search Camera to detect Wi-Fi cameras.
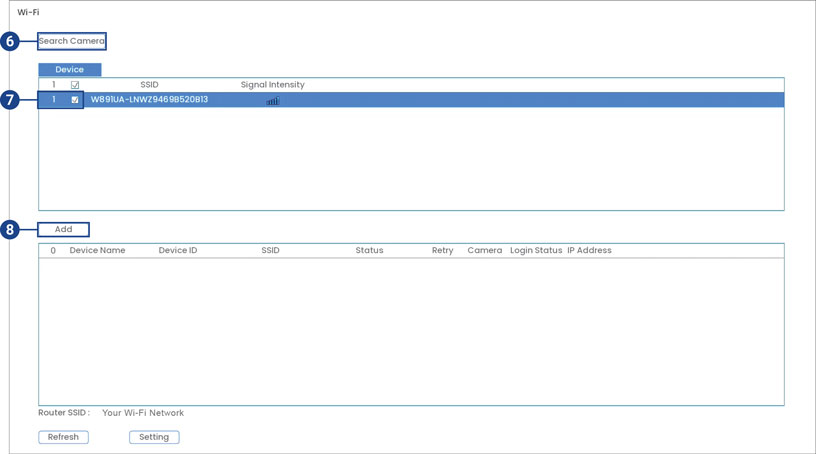
- Check your Lorex Fusion Wi-Fi Camera.
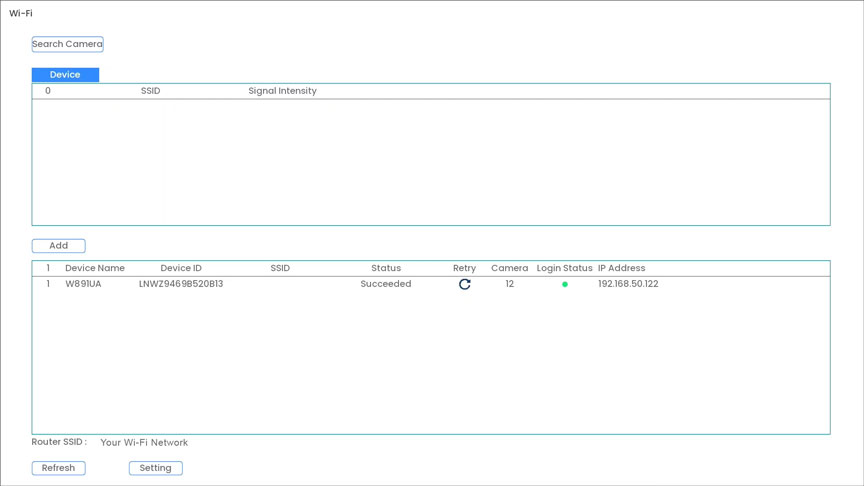
- Click Add. Your Lorex Fusion Wi-Fi Camera will appear in the section below.
Note:
- It may take a few minutes for your Lorex Fusion Wi-Fi Camera’s video feed to appear.
- If your Lorex Fusion Wi-Fi Camera’s Status shows as Connection Failed, hover over the text to learn why.
Option B — Connecting Your Existing Lorex Fusion Wi-Fi Camera to Your Recorder
Add compatible Lorex Fusion Wi-Fi cameras and accessories onto Fusion Wi-Fi channels on the recorder.
Note:
- Ensure your Lorex Fusion Wi-Fi Camera and recorder are connected to the same Lorex App account and network.
- Ensure your Lorex Fusion Wi-Fi Camera is powered on for Fusion setup.
To enable remote viewing for the mobile app, you will need to:
- Have high speed Internet.
- Have an upload speed of 6Mbps for one 4K+ channel and at least 20Mbps for the whole system.
- Access your recorder’s Device ID QR code. From the Live View display, right-click for the Quick Menu, then click Info.
To connect your Existing Fusion Wi-Fi camera to the recorder:
- From the Live View display, click the pair icon
 in the center of the Fusion Wi-Fi channel’s screen.
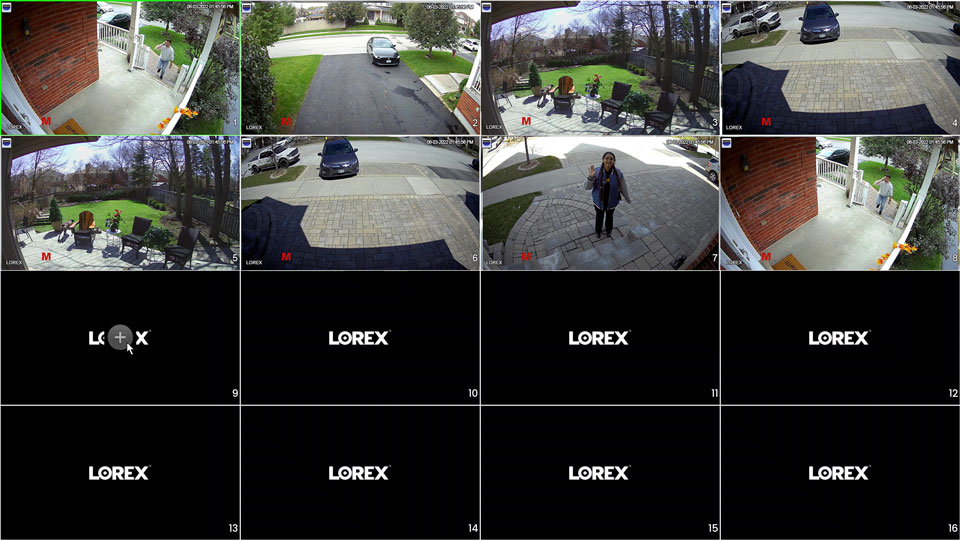
- Click Search Device.

- Select on your Lorex Fusion Wi-Fi camera and tap Add to add it.

- Right-click to exit the screen, then enter your Lorex Fusion Wi-Fi Camera’s password created in-app.
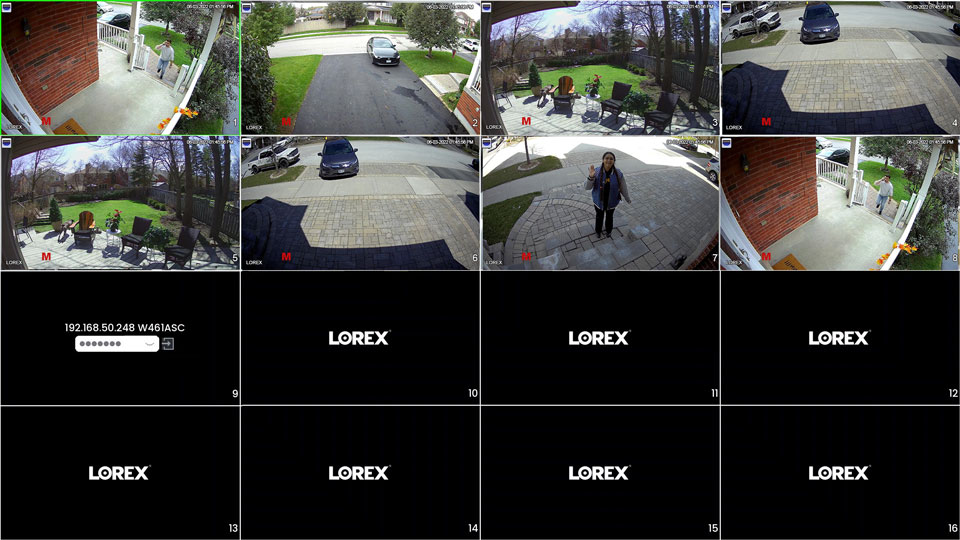
Note: It may take a few minutes for your Lorex Fusion Wi-Fi Camera’s video feed to appear.
To turn off duplicate notifications, adjust your camera's recording settings, or link motion sensors to cameras, see the article Lorex Fusion: Adjust Settings.