W891UA Series - 4K Dual-Lens Wi-Fi Security Camera: Troubleshooting Guide
The following are some of the most common issues and troubleshooting tips for your camera (W891UA).
Safely reset the camera
- Keep the camera powered on.
- Remove the Reset/MicroSD cover with a Phillips head screwdriver.
- Ensure direct access to the reset button by unmounting the camera or adjusting the angle.
- Press the reset button gently with a release pin or paper clip for 10 seconds until you hear the audio prompt. Avoid excessive pressure or using screwdrivers to prevent damage.
Look for the flashing green Smart Security Light to indicate that the camera has been fully reset.

 A solid or steady green light indicates that the camera has not been fully reset. You may have to redo the process again.
Camera not turning on
- Verify that the power cable and adapter are securely connected.
- Confirm that the power adapter is plugged into a functioning outlet.
- Check if the camera is in privacy mode, which suspends all live viewing and recording.
- Note that when the camera is not recording, it may enter sleep mode. You can wake the camera by accessing its live view or through motion detection.
- Try to safely reset the camera (steps outlined above).
Cannot Pair to the Lorex App
Temporarily disable any active VPN on your mobile device, as it may block the camera’s connection.
⚠ Note: Once pairing is complete, you can re-enable your VPN for regular use.
For iPhone/iOS:
- Go to Settings > VPN.
- Toggle the VPN switch off.
- Retry the onboarding process after disabling the VPN.

For Android:
- Go to Settings > Connections > More connection settings > VPN.
- Turn off the active VPN or disconnect from it.
- Retry the onboarding process after disabling the VPN.

Smart Security LED indicator is not flashing green
If you don't hear an audio prompt or if the status light is not flashing green, then your mobile device is not connecting with your Wi-Fi network. Reboot your Wi-Fi OR perform the following steps to reset your device.
- Use a Phillips head screwdriver to remove the Reset/MicroSD cover located on the bottom of the camera.
- Press and hold the reset button for 10 seconds until there is an audio prompt that your device is resetting.
- Look for the flashing green Smart Security LED light to indicate that the camera has been fully reset.
Smart Security LED indicator is stuck on solid red
Your camera's network connection failed.
- Tap
 above your camera's thumbnail.
 - Tap Wireless Network.
- Follow the in-app instructions to connect your camera to your network.
How to align the dual-lens image
In order for your camera to achieve the wide 180° field-of-view (FoV), the two connected views are stitched together using image Stitching Technology. This may result in a slight misalignment of the image.
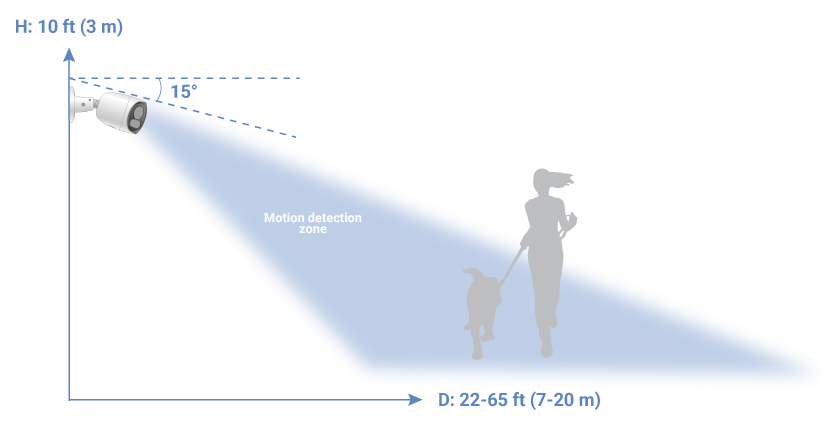
Be sure to follow these mounting instructions to ensure a clear panoramic overview of your property:
- Location: Place your camera in a wide, open space, and avoid placing it near any obstructions.
- Height: Install your camera at a height of 10 feet (3 meters) above the ground.
- Angle: Angle your camera to face outwards between 15-30°.
- Distance: Position your camera 22-65 feet (7-20 meters) within points of interest.
To adjust the right image's vertical alignment in the Lorex app:
- Tap above your camera's thumbnail.
- Tap Splice Distance Setting.
- Adjust the splice distance number for the right image to improve its alignment with the left image.
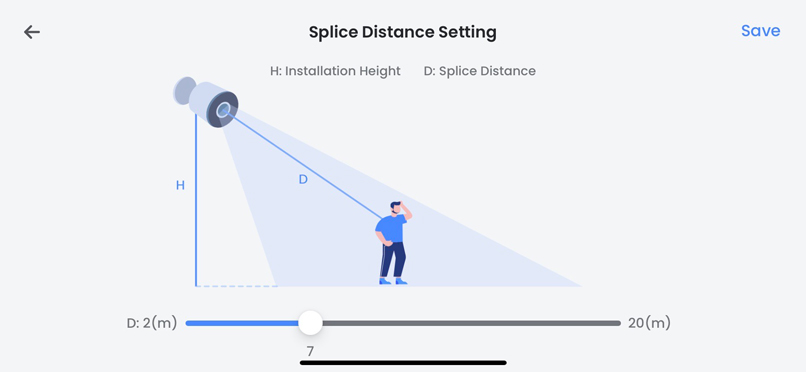
- To shift the right image upwards: Increase the splice distance number
- To shift the right image downwards: Decrease the splice distance number
- Tap Save.
Review your camera's Liveview while making adjustments, as it might require a few attempts to determine the correct splice distance number for aligning the dual-lens image.
Note: As a result of the camera's Stitching Technology, a subtle distortion may be present at the center line of the image.
How to improve the wide-angle perspective
The curvature effect in your camera's image may vary in specific scenarios. To minimize this effect, follow the recommended camera placement guidelines.
Given the wide 180° field-of-view (FoV) of your camera, it is recommended to install it in a wide, open space. Avoid installing your camera in areas with shallow depth or in close proximity to obstructions like roofing structures or soffits.
Your camera should be positioned to face outward at an angle between 15-30° from the level position, avoiding installation at angles exceeding 30°.
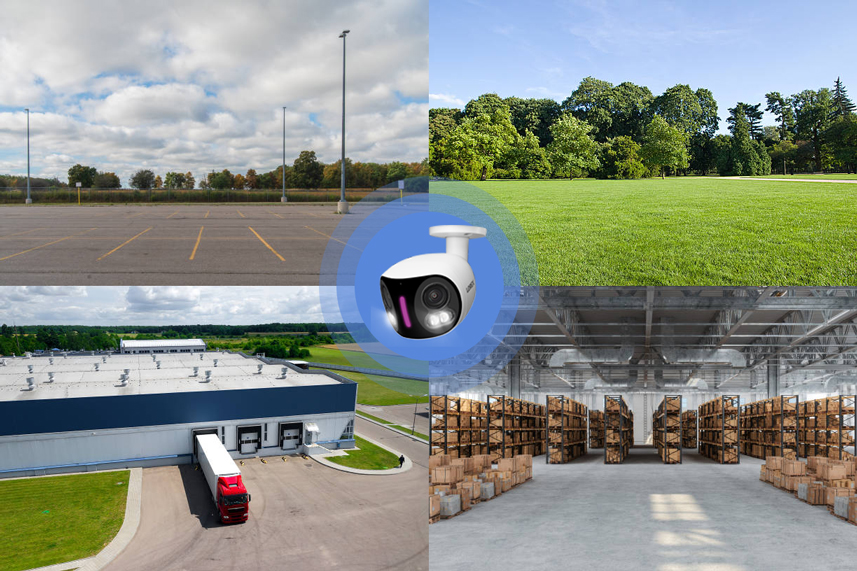
These images are for reference only.
Too many notifications
You may find that your camera is triggering frequently and sending too many event notifications. Refer to the article "Lorex App - Too Many Notifications" for a few troubleshooting tips to help reduce false alerts.
Camera's image has high contrast/glare
Avoid mounting your camera too low to the ground or up-close to reflective surfaces, particularly in sunny or mirrored spaces, as these can cause high contrast and glare in your camera's image.
Camera's image is not clear
- Check the camera lens for dirt, dust, and spiderwebs. Clean the lens with a soft, clean cloth.
- Remove the vinyl cover on the camera lens.
Audio function is not working
- Tap your camera's thumbnail to start the liveview.
- Tap Talk to speak through your camera from your mobile device. Tap again to listen in.
Cannot change the camera's recording duration
You cannot adjust the recording duration after motion is detected. The camera records for the duration of detected motion. However, you have the option to switch from motion detection recording to continuous recording, which records for 24/7. Note that continuous recording will quickly consume your MicroSD card memory.
To switch from motion detection recording to continuous recording:
- Tap above your camera's thumbnail.
- Tap Local Storage.
- Tap
 to enable Continuous Recording.
Forgot camera's password
If you have forgotten the password for your camera, the quick and easy way to resolve the issue is to perform a hard reset on your camera OR perform the following steps:
- Tap above your camera's thumbnail.
- Tap Device Info.
- Tap Device Password.
- Enter your old password and the new password.
Your password must be 8-32 characters in length, and must contain a combination of numbers, letters, and symbols. - Tap Save.
Forgot Lorex app account password
If you have forgotten the password you created for the Lorex app, tap Forgot password? on the login screen and follow the in-app instructions.
General troubleshooting support
Many issues can be resolved with the following troubleshooting steps:
- Ensure the latest version of the required software/app is installed and has the most recent firmware (if applicable).
- If using client software or a mobile app, ensure your device meets the minimum system requirements.
- Ensure the Internet connection and speed meet the minimum requirements for the product.
- Check the power connection(s).
- Power cycle the product(s). To power cycle your product, please power off (if applicable) and disconnect the power source for approximately 30 seconds. Reconnect, and power on.