B862AJ Series - 4K Wired Video Doorbell: Installation
This article provides instructions for installing your 4K Wired Video Doorbell B862AJ.
Table of Contents:
What's Included
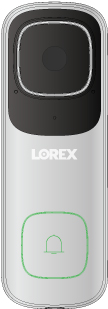
- 4K Wired Video Doorbell
- Mounting Bracket
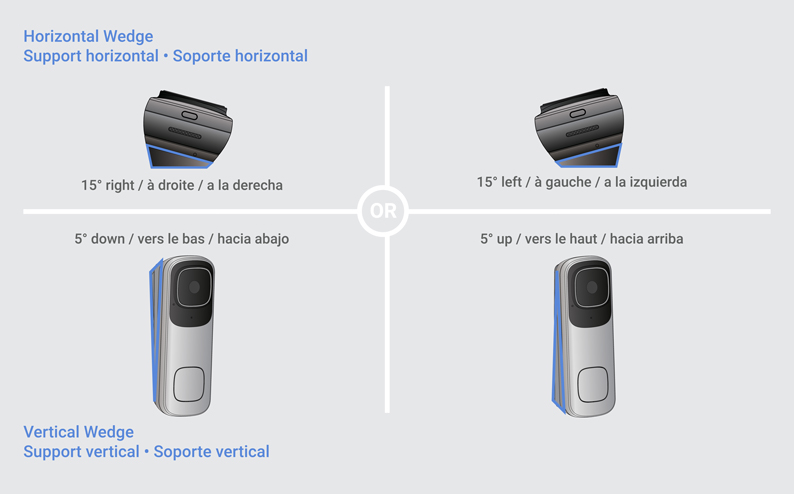
- Horizontal Wedge 15°
- Vertical Wedge 5°
- USB Power Cable
- Extension Wire
- Connecting Wires
- Chime Kit
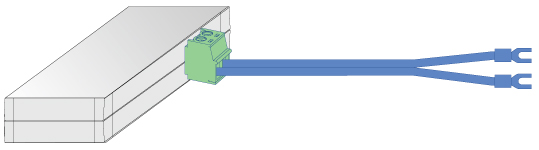
- Wire Harness
- Anchors & Screws (x2)
- 1/4" Drill Bit
- Wire Caps (x3)
- Reset / Release Pin
App Setup
- Download the Lorex app from the App Store or Google Play Store.
- Launch the app and create an account, or login.
- Connect your video doorbell to power using the USB Power Cable.
- Tap the add (+) icon to connect your video doorbell.
- Scan your video doorbell's Device QR code. The QR Code is located on the back of your video doorbell.
- Follow the in-app instructions to complete setup.
Smart Security LED Indicator
The Smart Security (SS) LED surrounds the outside of your doorbell's Smart Security (SS) Call Button and indicates how your doorbell is operating. The following section describes how the LED works if you did not change the default LED settings.
- Flashing blue: Your video doorbell is ready for network connection.
- Flashing blue quickly: Your video doorbell is pairing to your Lorex account / An event was detected.
- Solid green: Your video doorbell is operating correctly.
- Spinning green: The calling function on your video doorbell is in use.
- Flashing green: The 2-Way Talk function on your video doorbell is in use.
- Solid red: Your video doorbell is resetting to factory default.
- Spinning red: Your video doorbell's network connection failed.
- Flashing red, blue, and green: Your video doorbell's firmware is updating.
*Try resetting the device by pressing and holding the reset button until you hear the audio prompt.
Installation
![]() WARNING: Risk of electrical shock. Always be careful when handling electrical wiring. If you are not comfortable doing it yourself, consult a licensed electrician.
WARNING: Risk of electrical shock. Always be careful when handling electrical wiring. If you are not comfortable doing it yourself, consult a licensed electrician.
- TURN OFF THE POWER RUNNING TO YOUR EXISTING DOORBELL AT THE BREAKER.
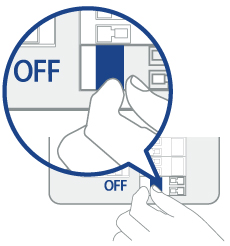
- Test that power has been disconnected by pressing the button on your existing doorbell. There should be no sound.
Note: 16-24 VAC is required. If you do not have this voltage, you will need a 16-24 VAC doorbell transformer.
Chime Kit Setup
Determine the type of doorbell chime you have in your home.
- Mechanical: You will hear a classic ding-dong sound. A mechanical doorbell is spring-loaded with levers and physical metal chimes.
- Electronic: If your doorbell sounds more like a melody then you have an electric chime box.
The setup process is the same, but when wiring for a mechanical chime, stay clear of the metal chimes or any of the moving components inside.
- Remove the cover panel of your existing doorbell chime box.
- Loosen the screws labeled FRONT and TRANS. Do not remove the screws and be sure to detach any connected wiring.
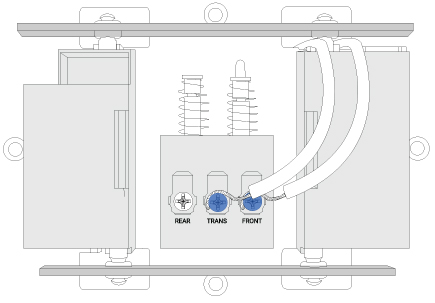
- Connect the green terminal on the end of the included Wire Harness to the Chime Kit.
- Connect the wiring from the Chime Kit to the FRONT and TRANS connectors in the Chime Box. Ensure that the existing wiring stays connected as well.

- Mount the Chime Kit to the inside of your Chime Box or along the cover plate using the included double-sided tape. Ensure the Chime Kit and wires are not touching the chimes or any of the moving components inside the chime box or the doorbell chime will not sound correctly.
Optional Wedge Installation

Align and place either one of the Horizontal Wedge 15° (right / left) or Vertical Wedge 5° (up / down) behind the Mounting Bracket and in the direction you want the doorbell to face.
To change the direction of the angle, flip the Horizontal or Vertical Wedge upside down.
Doorbell Setup
- Remove your existing doorbell and disconnect the wiring.
Tip: Bend the power cables so they do not fall through the wall.
- (Optional) Install the Wedges. Make sure the Wedge and Mounting Bracket align.
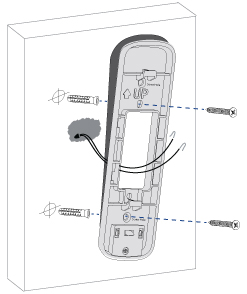
- Place the Mounting Bracket on the desired location with the arrow pointing up.
- Mark the holes for screws.
- Using a Phillips-head screwdriver and the provided screws, secure the Mounting Bracket to the surface.
Optional: If you are mounting your camera into drywall, use the provided drill 1/4” (6 mm) to drill holes where marked. Then use the provided anchors and screws.
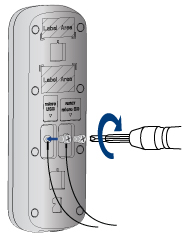
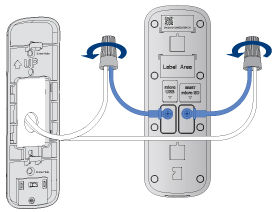
- Completely remove the power port terminal screws with a Philipshead screwdriver.
- Thread the screws through the metal loops of the Connecting Wires, and then tighten the screws clockwise.
- Align the ends of your existing wiring and Connecting Wires, place the Wire Caps over the exposed wiring, and then twist the Cap clockwise to tighten.
- Push the wiring back into the wall. Make sure there is enough space to fit the cable connectors and wire caps into the hole in the wall.
- Press the doorbell into the Mounting Bracket. You will hear a 'click' when it secures into place.
- Reconnect power at the breaker.
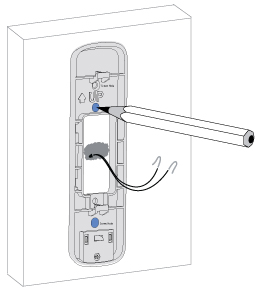
Note: If your existing doorbell wiring is too short, replace the Connecting Wires with the provided Extension Wire.
Don't forget to register your product!