< Back to list
ACSOL3 Series - Solar Panel for Battery-Operated Cameras: Installation Guide
This article provides instructions for installing your ACSOL3 Series Solar Panel for Battery-Operated Cameras.
Installation Tips:
- Choose a location for the solar panel with plenty of direct sunlight exposure. Do not install in a covered or shaded area. Performance is dependent on temperature and light exposure.
- Make sure to fully charge the camera battery pack. Refer to the product documentation for charging instructions.
Optional: To install the camera without any gaps between the device and the wall, drill holes to run the Solar Panel power cord through the wall.
Installing the Solar Panel:
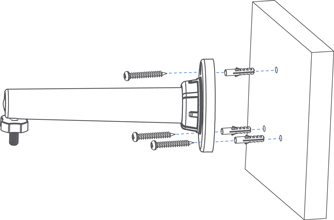
- Set the bracket to the desired mounting position.
- Mark holes through the Bracket.
- Using the included drill bit, drill holes where marked.
- Using a screwdriver, secure the Bracket with the provided screws.
Optional: If you are mounting the Solar Panel into drywall, use the provided drywall anchors.
- To adjust the Bracket, loosen the Bracket adjustment ring by turning it counterclockwise.
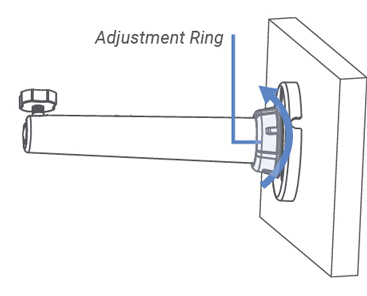
- Turn the Bracket’s Threaded Ring counterclockwise, to lower the Ring.
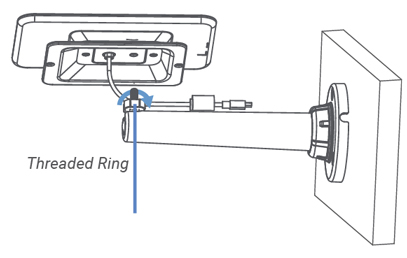
- Twist the solar panel clockwise onto the Bracket.
- Adjust the angle of the solar panel to receive direct sunlight, then tighten the Adjustment Ring.
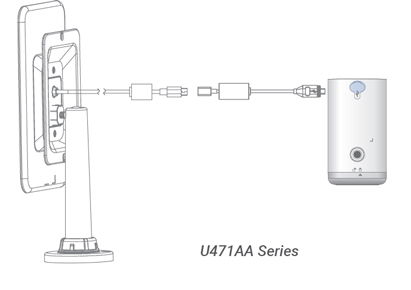
- Connect the Solar Panel cord to the desired adapter.
Connecting the Solar Panel directly to the camera
- Run the Solar Panel cord to the camera.
- Pull up the power port cover on the camera, and then connect the Solar Panel cord to the camera.

Connecting to the camera using an adapter
- Connect the Micro USB Adapter to the Solar Panel cord.
- Run the Solar Panel cord to the camera.
- Pull up the power port cover on the camera.
- Connect the adapter to the camera power port.