Lorex Cloud App - How to Change or Reset Your Recorder's Password
This article offers guidance on how to change the password of your Lorex recorder for security purposes or reset it in case you have forgotten it.
Note: These instructions apply to recorders supported by the Lorex Cloud App. Refer to the Lorex Cloud App Product Compatibility Chart for a list of compatible recorders.
- If your recorder is supported by the Lorex App, refer to the article "How to Change or Reset Your Recorder's Password (Compatible with Lorex App)."
- If your recorder is supported by the Lorex Cirrus App, refer to the article "How to Change or Reset Your Recorder's Password (Compatible with Lorex Cirrus App)."
- If your recorder is supported by the Lorex Pro App, refer to the article "How to change or reset your recorder's password (compatible with Lorex Pro App)."
Changing Your Password via Your Recorder
Retrieving your device ID
- Retrieve your recorder's Device ID. You can locate the Device ID in the following ways:
- On the side panel of your recorder, alongside the Device ID's QR Code.
- In your recorder's system, right-click then click Info.
- In the Lorex Cloud app, go to Settings > Device Info.
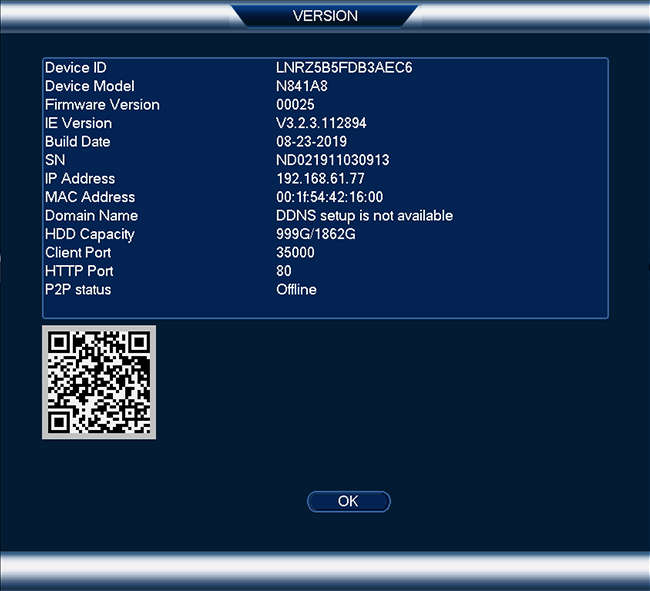
- Once you have the Device ID at hand, please take a picture of the Device Info screen and the sticker with the serial number and model number found on unit. Refer to How to Reset Your NVR or DVR's Password to obtain a temporary password so that you can access your recorder and reset the password.
Changing or Resetting Your Recorder's Password
Note: When resetting your password, use the temporary password sent to you. The temporary password is valid until the end of the day. If you haven't received a temporary password yet, refer to "How to Reset Your NVR or DVR's Password".
- From the Live View display, right-click to open the Quick Menu, then click Main Menu.
- Click ACCOUNT, then the User tab from the side panel.
- Click
 next to the account you want to change the password for.
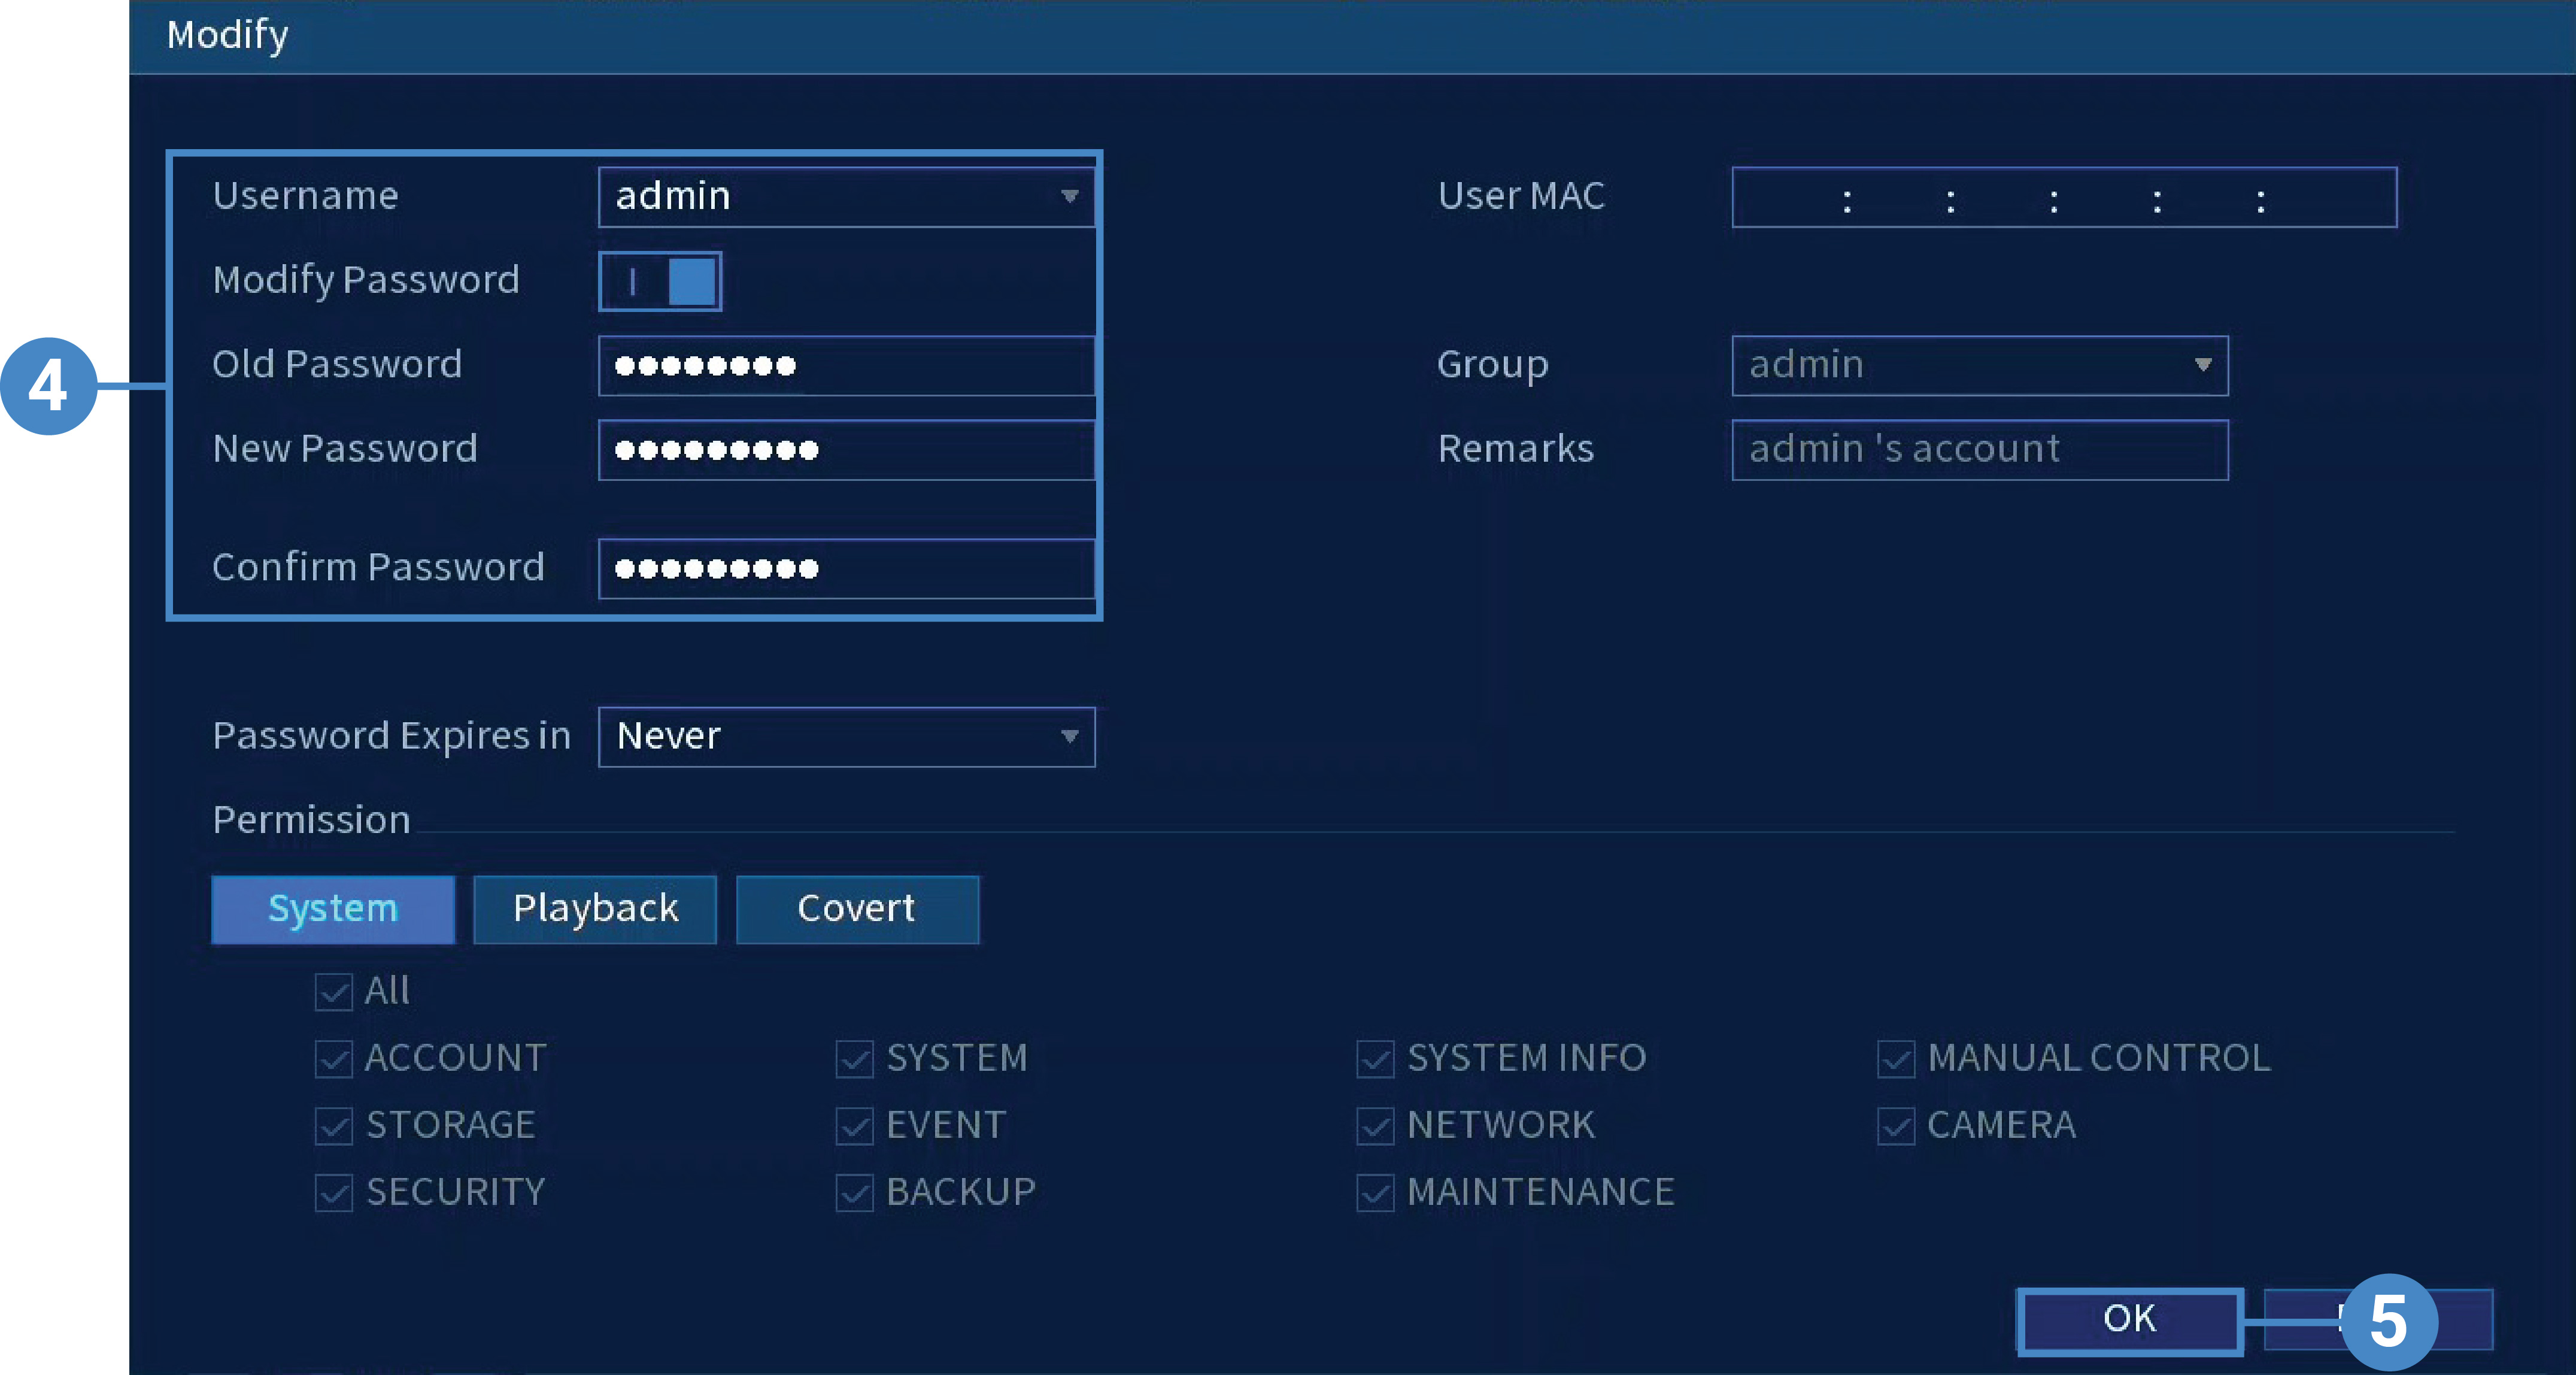
- Configure the following:
- Username: Set to admin.
- Modify Password: Check to modify password.
- Old Password: Enter the current/reset password.
- New Password: Enter the new password you want to use for the system.
- Confirm Password: Re-enter the new password.
Note: Passwords for the system must be a minimum of 8 characters, and must include at least 2 of the following character types: lowercase, uppercase, numeric, and special characters.
- Click OK.