ACSOL2 Series - Lorex Solar Panel: Frequently Asked Questions (FAQs)
The following frequently asked questions (FAQs) provide more information about the Lorex Solar Panel (ACSOL2). Where applicable, the FAQ includes links to articles where you may find more information.
Which camera is compatible with the Lorex Solar Panel?
The 2K Smart Deterrence Wire-Free Camera with Person Detection (U471AA) is compatible with the Lorex Solar Panel.
Should I charge the camera battery pack first?
Yes. The Solar Panel is designed to maintain the camera battery pack’s charge. Please fully charge your battery pack first using the micro USB cable included with the camera. This will take 4-6 hours. The purpose is to allow for camera setup time and if the initial days are not sunny.
How do I know if the Solar Panel is charging?
Method 1: Launch your Lorex App and check the battery icon displayed for the camera.
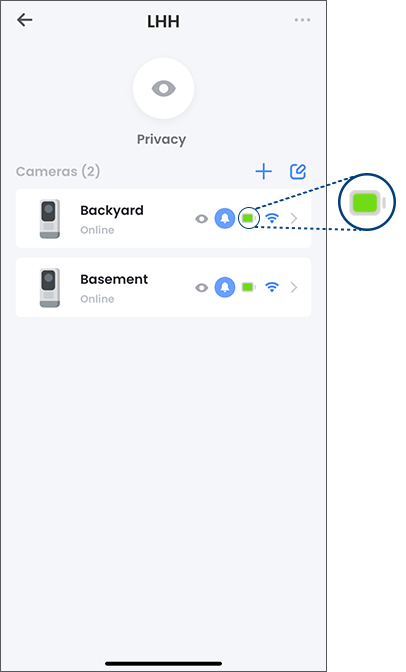
To view your battery level:
- Launch the Lorex App.
- Tap the settings icon (
 ) under the device that you are checking for. The battery icon will be displayed alongside the camera's name.
Method 2: Check the red LED indicator on the back of the solar panel. If the LED turns on, the solar panel is receiving enough light to maintain the camera battery pack’s charge.
For troubleshooting tips related to charging, see the article Lorex Solar Panel is not charging the camera.
Why is the Solar Panel not charging my camera?
Make sure of the following:
- Fully charge the camera battery pack. Refer to the product documentation for charging instructions.
- Choose a location for the solar panel with plenty of direct sunlight exposure. Do not install in a covered or shaded area. Performance is dependent on temperature and light exposure.
- You must have the latest camera firmware. Upgrading the NVR firmware will not resolve compability issues.
To upgrade the camera firmware:
- Call tech support at 1 888 425 6739 and request the latest camera firmware.
- Place the file on a USB drive (not included).
- Insert the USB drive into one of the USB ports.
- From the NVR Live View screen, click
 > Setup > System > Maintenance > Upgrade.
 - Click Select File
- The drive menu appears. Navigate to and select the .bin firmware file, then click OK.
- Click Upgrade to confirm when the pop-up appears.
- Allow 5-10 minutes for the camera and system to reboot. Do not power off the recorder or cameras during the firmware upgrade.
How do I position the Solar Panel to get the most sunlight?
- Location: Choose a location for your Solar Panel that gets the most sunlight. Avoid placing the Solar Panel in a shady spot or in front of trees and buildings, as they will significantly reduce the power output.
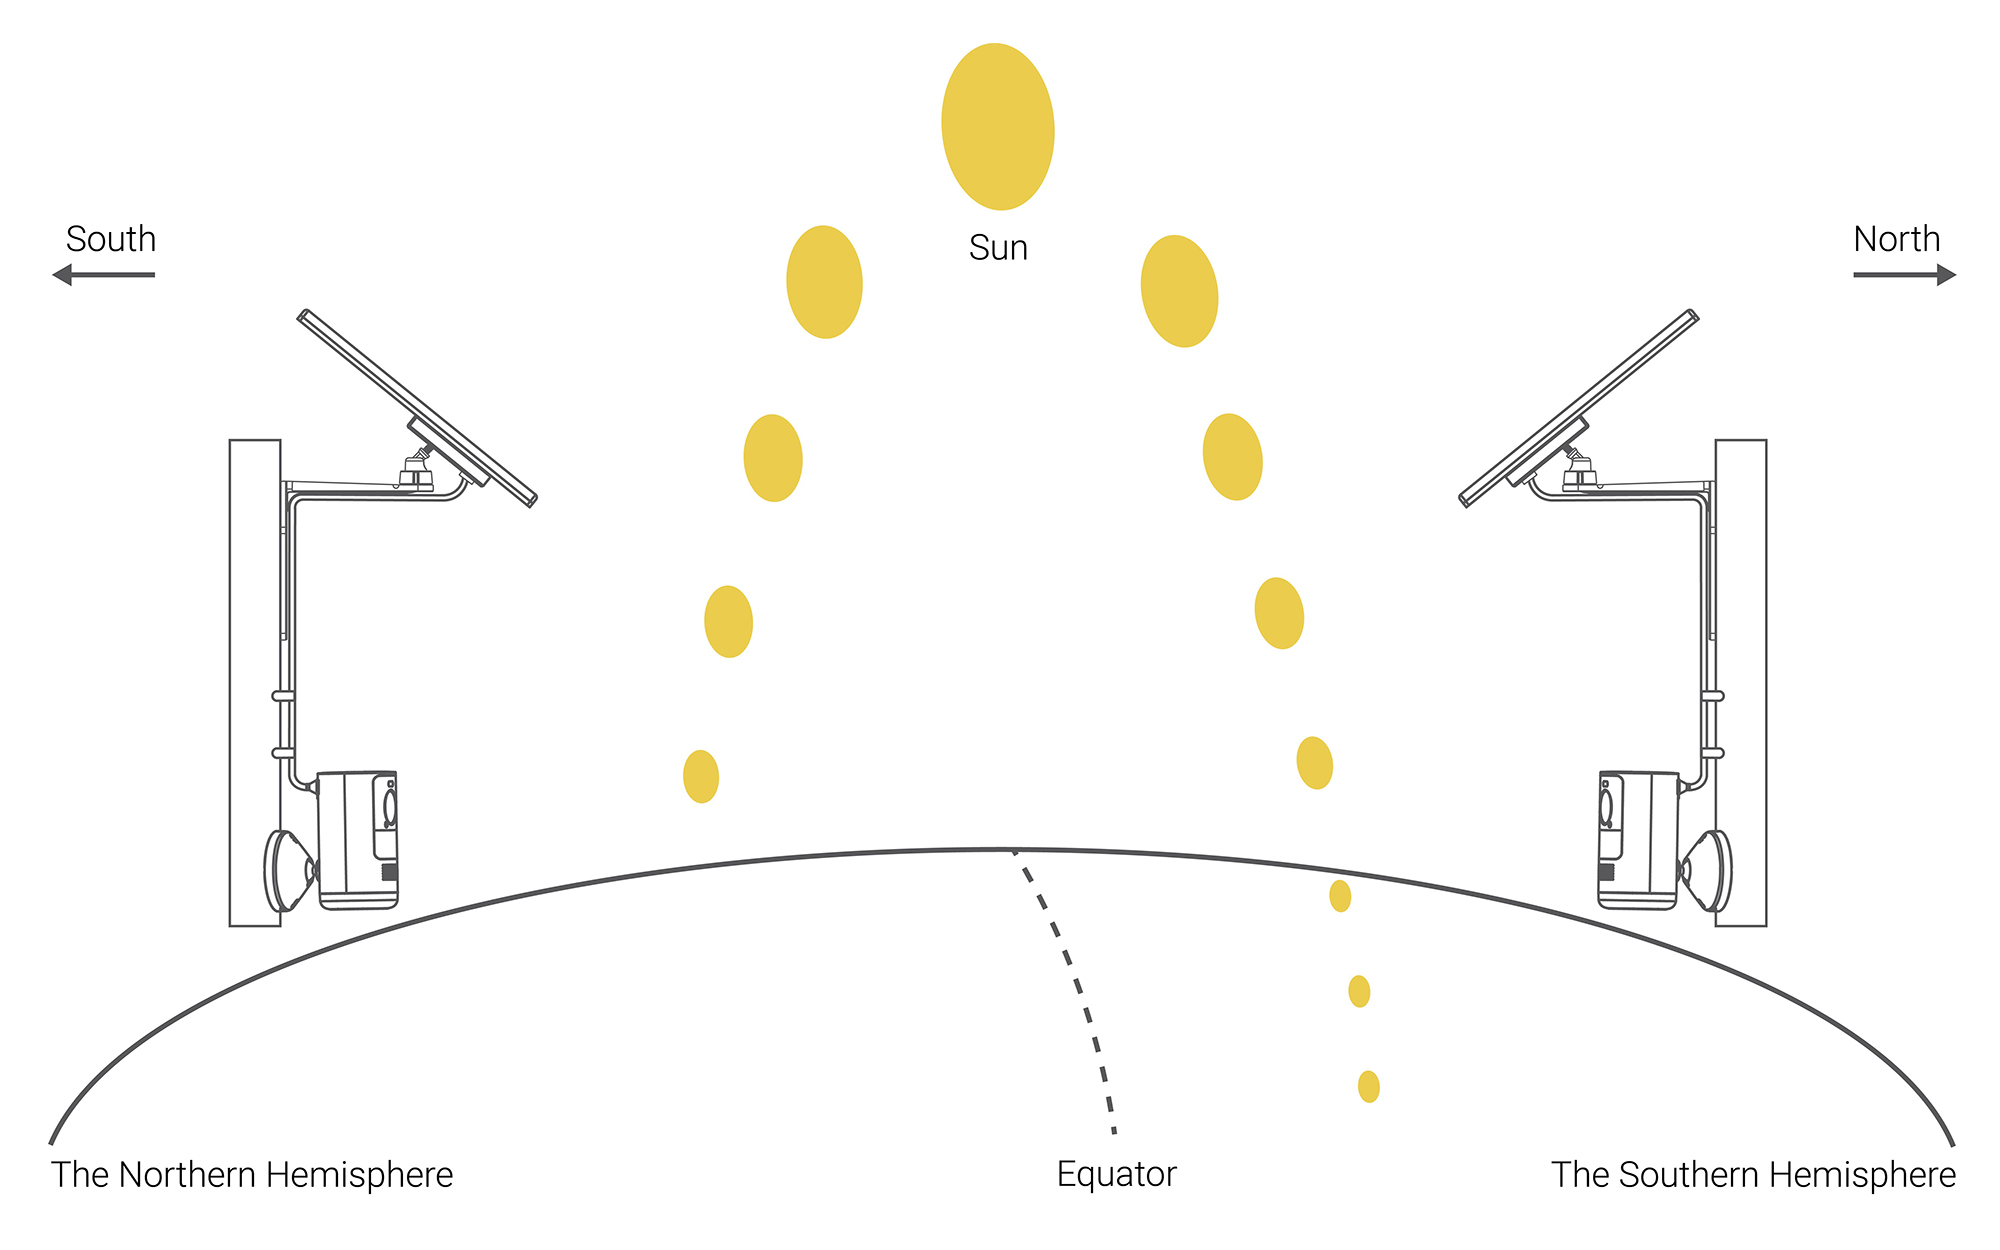
- Direction: The optimal angle varies throughout the year, depending on seasonal changes and your geographic location. As a general guideline, the Solar Panel should be facing the equator; in the northern hemisphere, the Solar Panel faces south and in the southern hemisphere, the Solar Panel faces north. Note: In North America that means pointing the panel south.
How do I angle the Solar Panel?
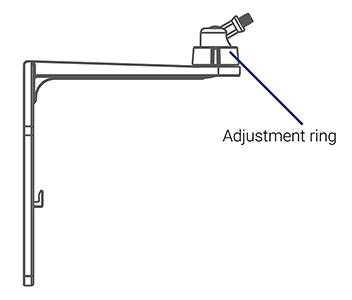
Use the adjustment ring on the wall mount to angle the Solar Panel towards direct sunlight.
Where can I use the Solar Panel?
- You can use the Solar Panel in any outdoor location that falls within the operating temperature range of 86° to 122°F (-30° to 50°C).
- The Solar Panel and included wall mount should be placed in an area that gets at least a few hours of sun each day. Be sure to look out for anything that could block the sun, such as overhanging branches.
- The included wall mount can attach to walls, roofs, or fences. The wall mount’s adjustment ring and the attached 10ft (3m) weather-resistant power cable provide a wide range of mounting and positioning options.
What can affect the efficiency of the Solar Panel?
External factors can affect the effectiveness of the Solar Panel generating power, such as shade, temperature, cloudy or snowy weather, and the amount of dust or debris on its surface.
What are the technical specs of the Solar Panel?
- IP66 Weatherproof
- Long 10ft (3m) power cable
- Adjustable wall mount
- Pre-attached Velcro cable tie
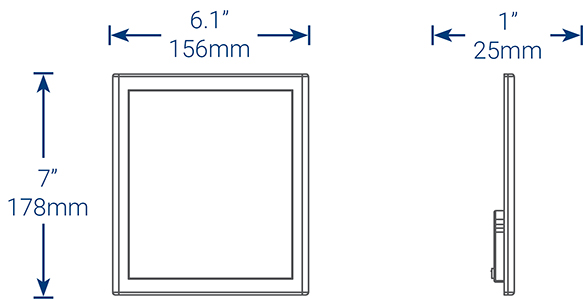
What are the dimensions of the Solar Panel?
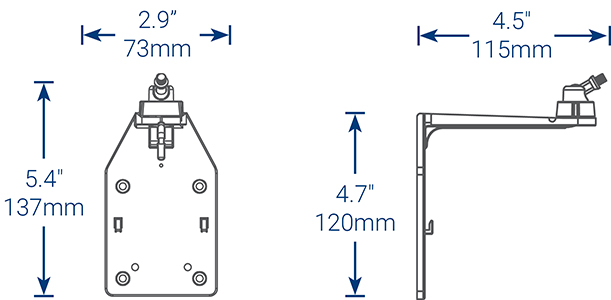
What are the dimensions of the Solar Panel's wall mount?
What comes in the box?
- Solar Panel with Velcro Tie
- Wall Mount
- Wall Mount Template
- 4x Wall Mount Screws
- 4x Wall Mount Anchors
- 2x Adjustment Ring Screws
- 1/4” (6mm) Drill Bit
- 3x Cable Guides
Is the Solar Panel weather-resistant?
Yes. The Solar Panel connects to the 2K wire-free camera with a weatherproof outdoor power cable.
How do I mount the Solar Panel?
For full instructions on mounting the Solar Panel, see the Lorex Solar Panel Installation Video.
How do I mount the 2K wire-free camera separately from the Solar Panel?
For full instructions on mounting the camera, see the article 2K Wire-Free Camera - Mounting installation.
What are the cable management options?
- Use the adjustable Velcro cable tie to secure the power cord and organize any clutter.
- Attach the Solar Panel's 10ft (3m) power cable to the wall using the (3x) cable guides, screws, and anchors as needed.
Where can I order the Lorex Solar Panel?
To order, go to lorex.com.