Back to list
LNZ81P25, PTZ Series, P25 - 4K IP Wired Camera with 25x Zoom and IK10 Vandal-Proof Rating: Installation Guide
The following article provides installation instructions for your 4K Ultra HD IP 25× Pan-Tilt-Zoom Camera.
Installation Tips & Warnings
- Warning: Make sure to install the camera in a location that can support the combined weight of the camera and wall mount (weight: 11.7lb/5.3kg).
- Camera is rated for outdoor use. It is recommended to install the camera in a sheltered area, such as under the eaves on a roof.
- It is recommended to install the camera as high up as possible to get the best possible image.
- Mount the camera where the lens is away from direct and intense sunlight.
- Plan your cable wiring so that it does not interfere with power lines or telephone lines.
- Ensure you adhere to local building codes.
- Ensure that the camera wiring is not exposed or easily cut.
- Mount the camera in an area that is visible but out of reach.
Installation (Indoor / Outdoor)
Caution: Make sure to disconnect the power cable before installing the camera. Camera will begin moving immediately when power cable is connected.
To install the camera on a wall:
- Attach the rubber ring to the back of the wall mount to ensure the weatherproof rating of the camera.
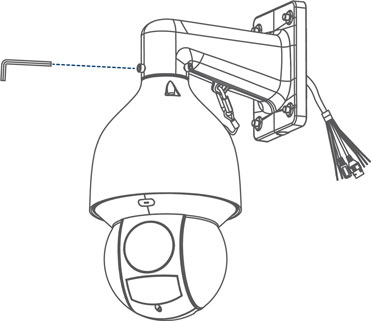
- Use the Allen key to attach the M6x14 screws (x3) to the wall mount. Do not tighten all the way.
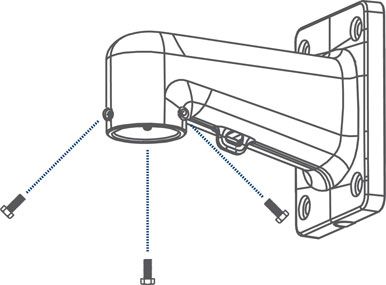
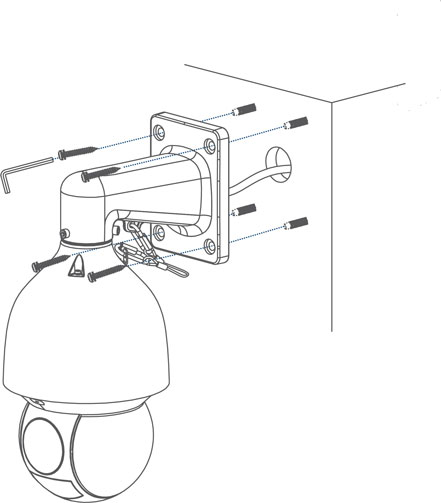
- Use the included wall mount to mark holes for the mounting anchors (x4) and cables.
Note:
- Vertical distance between marked holes — 5.3"/135mm
- Horizontal distance between marked holes — 4"/102mm
- Cable hole diameter — 2”/50mm
- Drill holes (drill bit size — 3/8”) to a depth of 2.8”/70mm in the mounting surface where marked.
- Insert the mounting anchors (x4) into the holes and tap them into the wall with a hammer.
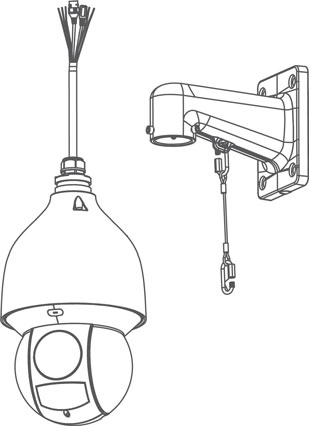
- Connect the safety chain between the camera and the wall mount. This allows the camera to hang from the wall mount while connecting the cables.
Caution:
- You must connect the safety chain between the camera and the wall mount to protect the camera from falling while connecting the cables.
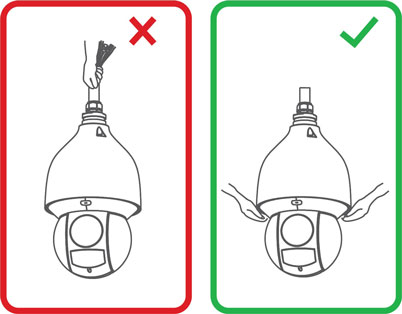
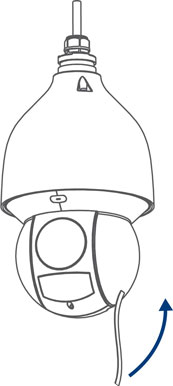
- Do not hold the camera from the cable. Hold the camera from the edge of the dome cover.
- Push the connection cables into the wall mount.
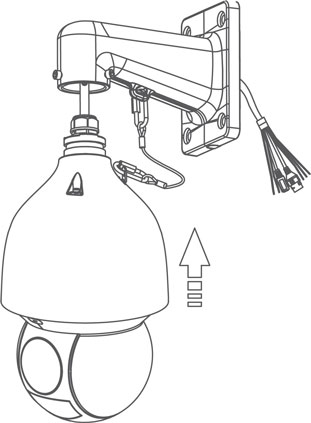
- Push the camera into the wall mount with the flat surfaces aligned on the inside. This will allow the M6x14 screws (x3) to align with the holes on the camera.
- Use the included Allen key to tighten the M6x14 screws and secure the camera in place.
- Connect the connection cables. To connect the cables using the waterproof connector:
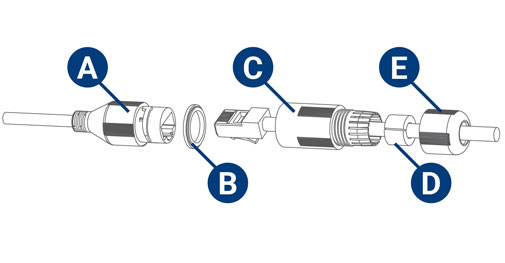
- A: Camera Ethernet Connector
- B: O-ring
- C: Barrel
- D: Stopper
- E: End Cap
- Fit the o-ring around the camera Ethernet connector.
- Feed the Ethernet extension cable through the end cap and the barrel then connect the cable to the camera Ethernet connector.
- Twist the barrel securely onto the camera Ethernet connector. The o-ring becomes compressed when the seal is properly tight.
- Split the stopper to wrap it around the cable between the barrel and end cap as shown above.
- Push the stopper toward the barrel until it is underneath the teeth at the end of the barrel.
- Twist the end cap clockwise to secure it onto the barrel. The stopper becomes compressed and will stick out of the end cap slightly when the seal is properly tight.
- Pull the connection cables through the wall mount and mounting surface.
- Attach the flat washers (x4) to the mounting screws (x4).
- Use the included Torx Key, mounting screws (x4) and flat washers (x4) to firmly attach the wall mount to the mounting surface.
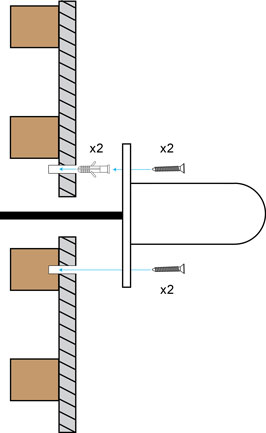
Warning: Make sure to install the wall mount bracket in a location that can support the camera’s weight. If mounting the camera on a drywall surface, you must drill at least 2 of the mounting screws through a wooden stud to ensure a stable mount. See the diagram below for details.
- Remove the protective vinyl sheet covering the camera lens once installation is completed.
For more information on configuring your PTZ camera, see the following articles:
- Controlling Your 4K Ultra HD IP 25× Pan-Tilt-Zoom Camera
- Setting Presets on Your Pan-Tilt-Zoom Camera
- Using Auto Tracking