ACH20-1B Thermal Monocular Camera: Troubleshooting
The following article provides some troubleshooting tips for using your thermal monocular camera.
Camera’s image/screen is blurry.
Adjust your camera’s diopter to your eyesight. Before you begin, it is highly recommended that you adjust your camera’s diopter to your eyesight. Focusing your view will minimize eye strain and fatigue.
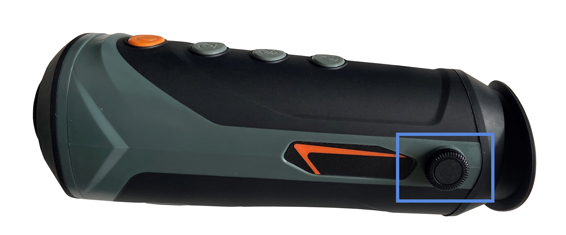
- Point your camera at something solid.
- Begin turning the diopter adjustment dial. As you are adjusting the dial, move it left or right until the display appears clearly in your camera's screen.
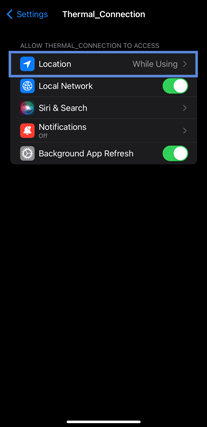
Camera's Wi-Fi hotspot is not showing.
- Wait a moment for it to appear in your phone’s Wi-Fi settings.
- When enabling your camera’s hotspot in your camera’s settings, try to press
 a couple more times.
 - Ensure you have allowed the app to use your location, otherwise it will not be able to detect your camera’s Wi-Fi.
Navigate to your phone’s settings, then open the Thermal Connection app settings, and enable Location — While Using the App.
Camera is not connecting to the app.
The Wi-Fi password is case sensitive. Make sure you enter the serial number in the same letter format, whether that is uppercase or lowercase.
Camera has disconnected from the app.
- Your camera’s hotspot dropped. Enable your camera’s wi-fi hotspot once more, and then login to the app again.
- After being inactive, your camera will either go into sleep mode or automatically shutdown, which in turn causes it to time-out in the app. To connect to the app again, you will need to first tap System > Sign Out.
Camera’s Live View is frozen in the app.
If the Live View is frozen perform a hard close of the app, then open it again.
Digital zoom is not working.
Digital zoom will not work while your camera’s menu is open. Press  to exit the menu.
Camera is not recording images and videos.
Recording images and/or videos will not work while the menu is open or when your camera is connected to a computer. Press to exit the menu.
Camera’s screen is black.
Restart your camera. Press and hold to turn your camera off, and then back on.
Camera is not charging or slow to charge.
- Ensure you use the supplied micro-USB cable and that it is properly connected.
 DANGER
- Improper battery replacement or use may result in fire, explosion, or other hazards.
- Only use accessories regulated by the manufacturer. Never use the charging cable or power adapter with another product.
- Make sure the plug is properly connected to the power socket.
- DO NOT charge your camera within 2 m of flammable materials.
- DO NOT connect multiple devices to one power adapter. The plug in the power socket could overheat and possibly cause a fire.
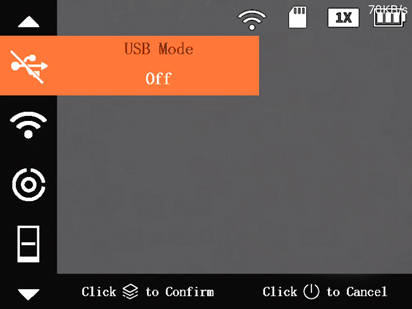
- Ensure the USB Mode is set to Off.
- Press and hold to open the menu.
- Press
 or
or  to navigate to USB Mode.
 - Press to open the setting.
- Press to select Off.
- Press to confirm your setting.
- Press the exit the menu.
- Press and hold
Camera’s battery keeps draining.
You can preserve your camera’s battery life in the following ways:
- Turn off any camera settings or functions that are not being used.
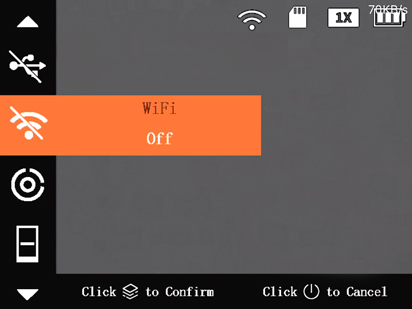
- Use your camera without the app. First, sign out your camera from the app, and then turn the Wi-Fi hotspot off.
- Press and hold to open the menu.
- Press or to navigate to WiFi.
- Press to open the setting.
- Press to select Off.
- Press to confirm your setting.
- Press the exit the menu.
- Press and hold
- Set your camera to go into automatic sleep mode after 1 minute of inactivity has passed. First set your camera’s sleep mode (Suspend Mode) to be automatic, and then set the automatic sleep mode (Auto Suspend) to 1 minute.
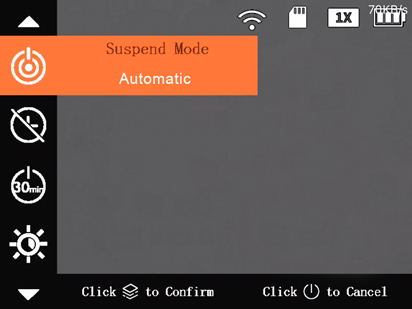
- Press and hold to open the menu.
- Press or to navigate to Suspend Mode.
- Press to open the setting.
- Press to select Automatic.
- Press to confirm your setting.
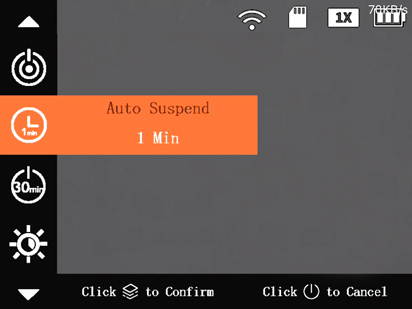
- Press to navigate to Auto Suspend.
- Press to open the setting.
- Press to select 1 Min.
- Press to confirm your setting.
- Press the exit the menu.
- Press and hold
- Set your camera’s screen brightness to low.
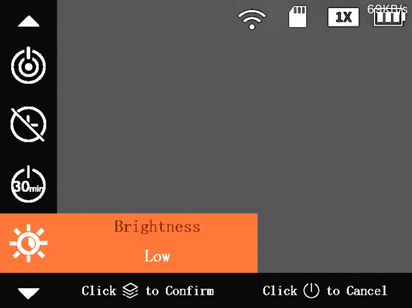
- Press and hold to open the menu.
- Press or to navigate to Brightness.
- Press to open the setting.
- Press to select Low.
- Press to confirm your setting.
- Press the exit the menu.
- Press and hold
- Set your camera’s automatic shutdown to 60 minutes or less.
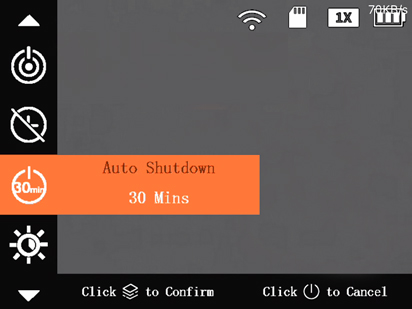
- Press and hold to open the menu.
- Press or to navigate to Auto Shutdown.
- Press to open the setting.
- Press to select 60 Mins or less.
- Press to confirm your setting.
- Press the exit the menu.
- Press and hold
Camera’s image has lots of graininess or scratches.
- Turn your camera off, attach the lens cap, and allow it to rest for a few hours before using again.
- To improve your camera’s image quality set the FFC Mode to Auto.
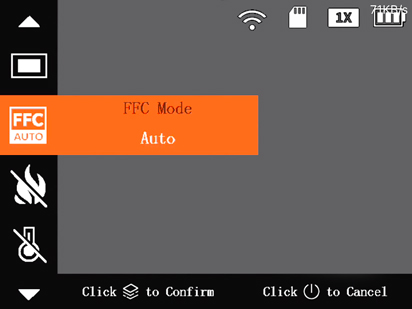
- Press and hold to open the menu.
- Press or to navigate to FFC.
- Press to open the setting.
- Press to select Auto.
- Press to confirm your setting.
- Press the exit the menu.
- Press and hold
- To manually correct pixel defects in your camera’s image, set the DPC settings to Manual.
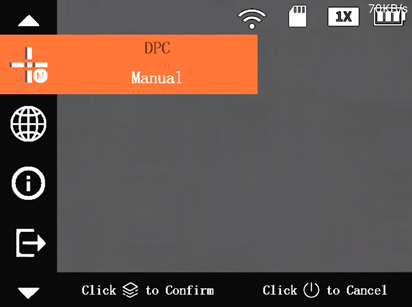
- Press and hold to open the menu.
- Press or to navigate to DPC.
- Press to open the setting.
- Press to select one of the options:
- Auto: (Default) Your camera automatically calibrates defective pixels.
- Press to start auto DPC.
- Close the lens cap until your camera signals that auto correction is complete.
- Press
- Manual: Correct the defective pixels manually.
- Press to start DPC manually.
- Press to switch between the X-axis and Y-axis.
- Press and hold or to start correction.
- Press
- Restore: DPC is restored to original state.
- Auto: (Default) Your camera automatically calibrates defective pixels.
- Press to confirm your setting.
- Press the exit the menu.
- Press and hold
Camera’s alarm is not turning on.
The fire detection alarm only works when fire detection has also been enabled.