ACH20-1B Thermal Monocular Camera: Frequently Asked Questions
The following FAQ answers many of the general questions about your thermal monocular camera.
How does my thermal monocular camera work?
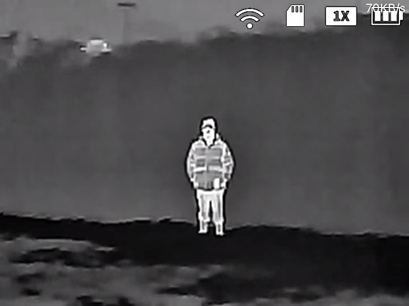
To improve the visibility of objects in complete darkness, haze, or tough conditions, your thermal monocular camera uses infrared sensors to detect heat given off by a person, animal, or other objects. It creates images of that radiation called thermograms, which display the relative temperatures of different objects with different shades or colors. In a thermogram, warm objects stand out in a contrast or often cooler background. It is widely used in outdoor scenarios for hunting, rescue, animal observation, and more.
Is my thermal monocular camera battery-operated or hard wired?
Your thermal monocular camera is battery-operated, however, to charge the battery you will need to connect the micro-USB cable into your camera’s USB port and the other end into a power source.
Does my thermal camera only work at night?
No. Although thermal imaging cameras are most commonly used for nighttime vision, they can also be useful in daylight. The detection of heat radiation and the high contrast of thermal imaging cameras allow you to see the outlines of (warm-blooded) animals that camouflage well in their environments. It can also help distinguish animals or people in foggy or smoky conditions.
Can my thermal camera see-through walls, metal, or glass?
No, thermal imaging cameras do not see-through surface but detect surface temperatures.
Is thermal imaging and night vision the same thing?
No, thermal imaging can produce pictures without visible light while night vision cameras work by boosting ambient light. Their only common purpose is increasing visibility in low light conditions.
Can bright sunlight damage my camera’s lens?
Yes, aiming your camera’s lens with the lens cap open at powerful light sources (i.e. the sun) is not recommended, as this may adversely affect the accuracy or damage the thermal imager.
What is the clicking noise my camera makes?
This is simply the noise your camera makes while you are shifting it between different fields of view. The noise you are hearing is your camera focusing and calibrating the image to achieve the highest resolution possible.
Should I charge my camera's battery before first use?
Since your camera's battery is delivered partially charged, it is recommended that you fully charge it before first use.
How do I charge my camera's battery?
- Insert the adapter plug for your region into the back of the universal power adapter.
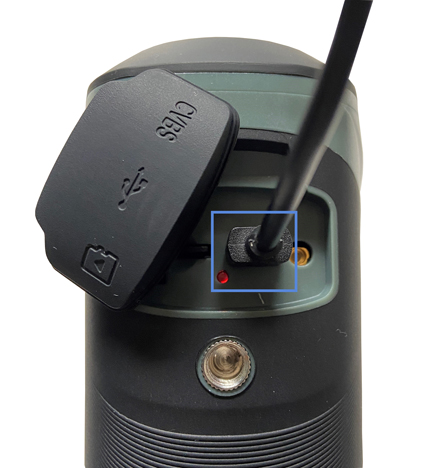
- Open the sealing cap covering your camera’s USB port.
- Connect the micro-USB cable to your camera’s USB port and the other end of the cable into the universal power adapter.
- Plug into a power source.
Your camera has the following 4 battery charging statuses, as shown by the LED charging indicator located under the USB port.
- Red: Charging
- Green: Fully Charged
- Off: Not Charging
- Flashing Red & Green: Charging Error
How do I turn my camera on or off?
Press and hold  .
.
Where can I find the mobile app?
The Thermal Connection Application can be downloaded on your smartphone with a valid Internet connection from iTunes or Google Play respectively.

See the article Connecting to the App for more details.
Why do I need to allow my Location Permission on the app?
The app requires permission to detect your Wi-Fi network in order to connect your camera to the app.
How do I connect my camera to the app?
See the article Connecting to the App for full details.
How do I disconnect my camera from the app?
For steps on disconnecting your camera from the app, see the article Using the App.
What is my camera’s Wi-Fi name and password?
- Wi-Fi Name: Your camera’s Serial Number (S/N)
- Wi-Fi Password: The last 8-digits of your camera’s Serial Number (S/N)
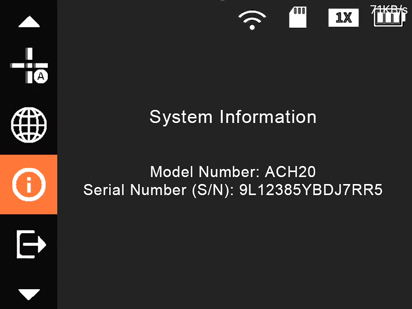
Where can I find my camera’s serial number?
Your camera’s serial number can be found on:
- The serial tag located on the side of your camera.
- Your camera’s system information.
- Press and hold
 to open the menu.
 - Press
 or
or  to navigate to
  (System Information).
 - Press to open your camera's system information.
- Press and hold
How do I record images & videos?
- To capture images: Press
- To start or stop recording videos: Press and hold for 3 seconds. A blinking red dot next to a recording timer on the left of the screen indicates that your camera is recording.
Note: Your camera cannot record images or videos while the menu is open or when connected to a computer.
For steps on recording images and videos from the app, see the article Using the App.
How do I zoom in my camera's image?
To switch the zoom range: Press . Keep pressing to zoom in and out.
For steps on using digital zoom from the app, see the article Using the App.
How do I turn the laser pointer on?
 LASER RADIATION:
Exposure to laser light can cause significant damage to the eyes. Never look into the laser beam directly or through a piece of optical equipment.
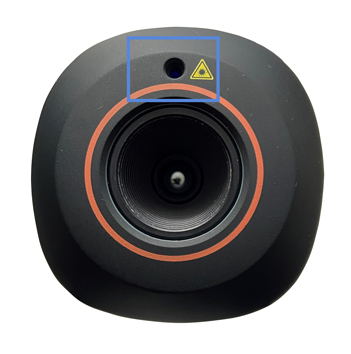
To turn the laser on: Quickly press two times.
For steps on using the laser pointer from the app, see the article Using the App.
How do I change my camera's color palette?
To quickly change the color palette: Press .
For steps on switching the color palette from the app, see the article Using the App.
Which color palettes can I choose from?
Select your camera’s color palette for enhanced visual representations of thermal imaging. Switch between any of the following color palettes:
- White Hot: The most used palette, White Hot displays warmer objects in white and then cooler objects in black, and everything in between in a shade of gray.
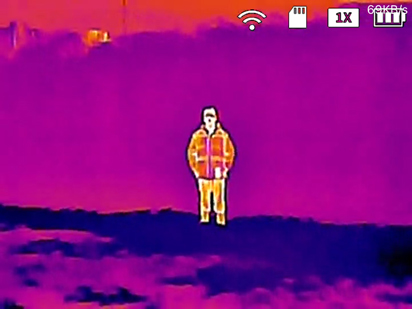
- Iron Red: This is a general-purpose palette that uses a variety of colors to showcase heat distribution. Red indicates the highest temperature, with an array of colors cooling off to blue as the temperature in the image decreases.
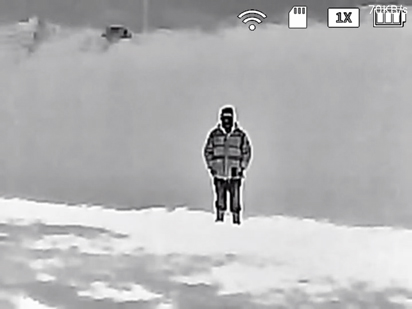
- Black Hot: Black Hot is the inverted version of White Hot, displaying warmer objects in black and then cooler objects in white, and everything in between in a shade of gray.
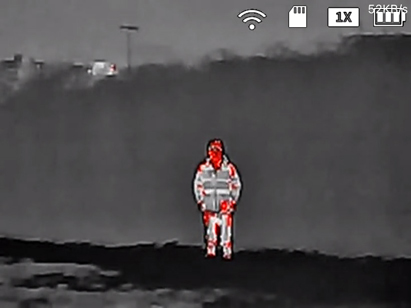
- Alarm: Based off White Hot, Alarm showcases warmer objects in a white color with heat indicated by a vibrant red. This palette was designed to quickly detect body heat.
Note: Not all color palettes are suited for every situation. Select the option that best shows the thermal differences for your specific application.
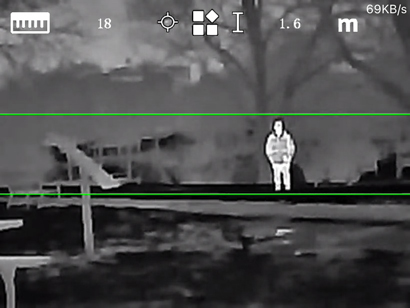
How do I measure my target's distance?
Measure the range distance between your camera and your target using the pre-set ranging modes for animals, people, etc.
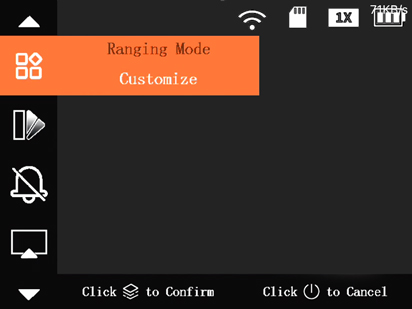
- Press and hold to open the menu.
- Press or to navigate to Ranging Mode.
- Press to open the setting.
- Press to select one of the options:
- Wolf: Measure your distance from a wolf, with a pre-set height of 1.2 m.
- Customize: Enter a custom height to measure your distance from your target.
- Wild Boar: Measure your distance from a boar, with a pre-set height of 0.9 m.
- Human: Measure your distance from a human, with a pre-set height of 1.8 m.
- Rabbit: Measure your distance from a rabbit, with a pre-set height of 0.3 m.
- Press to confirm your setting.
- Press to exit the menu.
How do I change my camera's measurement unit?
For steps on changing the measurement unit from the app, see the article Using the App.
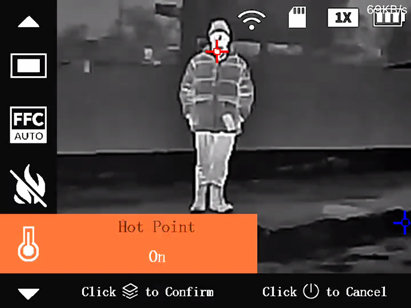
How do I track hot & cold points?
Track the hottest and lowest temperatures in your camera’s image at the same time. If enabled, your camera’s image will display a red target tracking the hottest point and a blue target tracking the lowest point.
- Press and hold to open the menu.
- Press or to navigate to Hot Point.
- Press to open the setting.
- Press to select one of the options:
- Off: Hot and cold points is turned off.
- On: Your camera will track hot and cold points.
- Press to confirm your setting.
- Press to exit the menu.
For steps on enabling hot & cold points from the app, see the article Using the App.
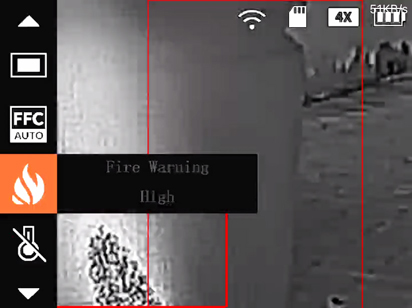
How do I enable fire detection?
Detect fires in your camera’s image with a red box surrounding the source. If enabled, you can set the fire detection sensitivity from high to low.
- Press and hold to open the menu.
- Press or to navigate to Fire Warning.
- Press to open the setting.
- Press to select one of the options:
- Off: Fire detection is turned off.
- High, Middle, or Low: Your camera will detect fires based on the sensitivity level.
- Press to confirm your setting.
- Press to exit the menu.
For steps on setting fire detection from the app, see the article Using the App.
How do I enable the fire detection alarm?
Set your camera to sound an alarm when fire is detected in the image.
Note: The fire detection alarm works only when your camera has fire detection enabled on either High, Middle, or Low.

- Press and hold to open the menu.
- Press or to navigate to Alarm.
- Press to open the setting.
- Press to select one of the options:
- Off: Fire detection alarm is turned off.
- On: Your camera will sound when fire is detected.
- Press to confirm your setting.
- Press to exit the menu.
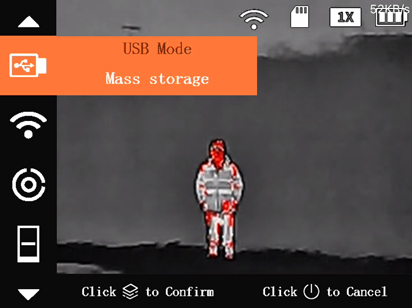
How do I export recordings?
Export recorded images and videos from your camera’s microSD card.
- Press and hold to open the menu.
- Press or to navigate to USB Mode.
- Press to open the setting.
- Press to select Mass Storage.
- Press to confirm your setting.
- Connect the micro-USB cable into your camera’s USB port and the other end into an available USB port on your computer.
- The microSD card’s storage will open on your computer desktop. Select files to export, then copy them onto your computer.
- After exporting, disconnect the micro-USB cable from your camera and computer.
- Press to select USB Mode Off.
- Press to confirm your setting.
- Press to exit the menu.
Where does my camera store recorded images and videos?
Your camera stores recorded images and videos onto the microSD card.
What is my camera’s maximum storage capacity?
You can insert a microSD card with up to 256GB storage space.
How do I hide the icons on the top right of my camera's image?
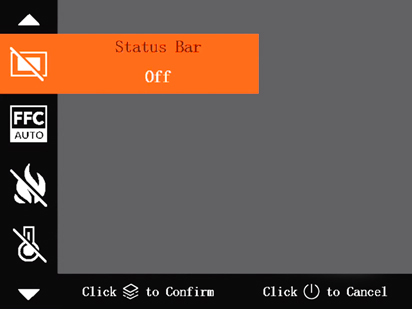
- Press and hold to open the menu.
- Press or to navigate to Status Bar.
- Press to open the setting.
- Press to select Off.
- Press to confirm your setting.
- Press to exit the menu.
How do I change the language displayed in my camera's menu?
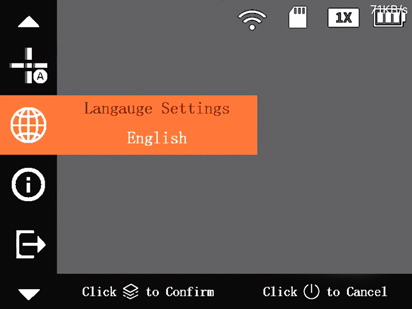
- Press and hold to open the menu.
- Press or to navigate to Language.
- Press to open the setting.
- Press to select your preferred language.
- Press to confirm your setting.
- Press to exit the menu.
Note: This will only change the language in your camera's menu, not the app.
How do I restore my camera’s settings to default?
For steps on restoring your camera's settings to default from the app, see the article Using the App.
How do I update my camera?
Update your camera through the microSD card.
Note: To download the latest firmware update for your camera, contact the Technical Support team.
- Press and hold to open the menu.
- Press or to navigate to USB Mode.
- Press to open the setting.
- Press to select Mass Storage.
- Press to confirm your setting.
- Connect the micro-USB cable into your camera’s USB port and the other end into an available USB port on your computer.
- The microSD card’s storage will open on your computer desktop. Copy the update program to the microSD card.
- Press and hold and at the same time for 3 seconds. A blue screen will indicate that an update is in progress.
After a few minutes the update will complete and you will see your camera’s live view image.
Where can I download my camera's latest firmware update?
To download the latest firmware update for your camera, contact the Technical Support team.
Can I mount my camera to a tripod?
Yes, the tripod thread can be found on the bottom of your camera.
Can I access my camera’s Live View from an external monitor?
Yes, you can access your camera’s Live View from your computer by connecting your camera using the micro-USB cable.
What is the buzzer option in the app settings?
The buzzer is not compatible with your camera.
If you are experiencing any issues with your camera, see the article Troubleshooting for tips & solutions.